Design Possibilities and Aesthetics
Stained and Dyed Finishes
Most people think concrete is grey. They forget it is a canvas. Acid stains and reactive dyes change the surface from the inside out. The result is a spectrum of earthy ochres, deep umbers, and soft sepias! I have seen a concrete floor in kitchen turn the colour of burnt sienna after one treatment. That kind of depth is hard to achieve with paint or tile.
Dyes work differently. They carry pigment into the pores without reacting with the material. This produces vibrant, even tones. You can match a specific Pantone swatch or keep it subtle with a translucent wash. The choice depends on the room’s light and your furniture. Darker stains hide daily wear; lighter shades open up a compact space.
Both methods require a sealer to lock in the colour and resist oils. But the aesthetic payoff is genuine. A concrete floor in kitchen becomes a feature, not a filler.
Polished Concrete Looks
Polishing changes the concrete floor in kitchen into a reflective plane. The grinding process exposes fine aggregate, creating a speckled surface that shifts with the light. I have watched a midday sun turn a polished floor into a pale silver sheet. That effect cannot be replicated by tiles.
The aesthetic range is broad. A matte finish offers understated texture. A high gloss delivers a sharp, almost wet appearance. Both options reduce dust collection and simplify cleaning. For homes along the Cape coast, a lower sheen handles sand better.
Design choices include:
- Salt and pepper aggregate for subtle depth
- Full metallic polish for a chrome like finish
- Bush hammered edges for contrast
Each concrete floor in kitchen becomes a bespoke surface, matched to how you live.
Textured and Matte Surfaces
A perfectly smooth surface tells only part of the story. The rest lives in texture. A matte finished concrete floor in kitchen resists the clinical glare of polished stone and offers a soft, chalky depth. Run your hand across it and you feel the faint drag of the aggregate beneath the sealer. That tactile quality changes how a room behaves. I have stood in kitchens where the floor felt alive beneath bare feet, and the difference was purely textural.
Consider these treatments:
- Steel trowel finish for a subtle sheen without the mirror effect.
- Light sandblast for a weathered, open grain that grips.
- Brushed surface with lines that catch the morning sun.
Each approach shifts the relationship between floor and light. A matte sealant dulls the reflective bounce, making a small kitchen feel quieter. For homes along the Cape coast, the grip matters more than the gleam. The concrete floor in kitchen becomes less a spectacle and more a foundation.
Incorporating Color and Patterns
The Karoo sky at dusk has a way of settling into the ground. That same ochre can be folded into a concrete floor in kitchen as mineral pigment, not paint. Two kilograms of oxide per batch alters the whole temperament of the room.
Patterns are cut, not drawn. Saw cuts tracing a hexagonal grid across the floor give order. I have seen a fragmented slate stamp near the cooking zone anchor the daily mess. A contrasting aggregate poured in a line guides the eye from the back door to the window.
- Borders in burnt orange anchor the perimeter.
- A center medallion in deep slate gives a formal weight.
- Random white blocks make a narrow galley feel broader.
Keep the sealer matte. A glossy topcoat over too much pigment dulls the depth. Trust me, the concrete floor in kitchen should feel like it has always been there, holding the light of the late afternoon!
Combining with Cabinets and Countertops
Most people pick cabinets under showroom lights and never look down. The concrete floor in kitchen spaces alters the room once the units are installed. A pale maple cabinet sits differently on warm grey than on cool charcoal. The same white quartz countertop reads as clinical over one base and calm over another.
Countertops and cabinets demand a surface that relates to their own undertones. A terrazzo countertop flecked with amber gains coherence when the concrete floor in kitchen carries the same oxide colour. That continuity is deliberate. Concrete encourages these pairings:
- Deep walnut cabinetry pairs with a pale floor with low sheen to prevent heaviness
- Matte black countertops suit a floor with a subtle aggregate
- Light oak cabinets need a floor with a grey undertone to avoid yellowing
I never specify a countertop without asking what the floor is doing. The floor dictates the whole composition!
Installation and Preparation
Evaluating the Existing Slab
Before anything else, you must evaluate the existing slab. A concrete floor in kitchen only performs well if its base is sound. I have seen too many installations fail because someone ignored a damp patch or a crumbling edge. Start by checking for cracks, unevenness, and moisture. Use a straightedge to detect dips larger than three millimetres. For moisture, tape a plastic sheet to the surface for a day. Sweat underneath means you need a vapour barrier.
- Inspect for old adhesive or paint residue.
- Tap the slab with a hammer to hear hollow spots.
- Confirm the slab has cured for at least 28 days.
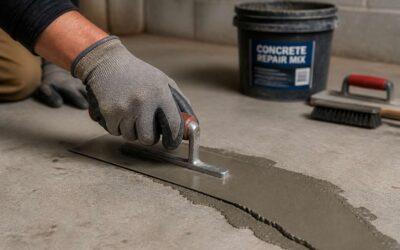
Grinding the surface with a diamond disc is essential. It removes laitance and exposes the aggregate. That creates a mechanical key for your topping or sealer. A concrete floor in kitchen deserves this attention, not a rushed skim coat. Take time to fill larger voids with a compatible repair mortar. Let everything dry fully before proceeding.
Underlayment and Moisture Barriers
A concrete floor in kitchen renovations often stumbles on moisture. Even after grinding and cleaning, the slab can weep unseen vapour. That is why a dedicated underlayment and moisture barrier matters as much as the decorative top layer. In South Africa, high water tables and coastal humidity make this step essential.
Start with a vapour barrier rated for the expected humidity. A 0.2mm polyethylene sheet is a common choice. Trim it to fit the space, leaving a slight overlap at the walls. Tape the seams with a specialised membrane tape. Over this, install a dimpled underlayment. The dimples create a capillary break, letting any residual moisture flow to a drain or evaporate at the edges.
- Check the slab’s moisture reading with a calcium chloride test before laying anything.
- Allow the barrier to extend up the wall by at least 50mm.
- Use a self levelling compound only after the barrier is in place.
Proper preparation prevents peeling sealer and bubbling toppings. A concrete floor in kitchen deserves this quiet insurance.
Pouring and Curing Process
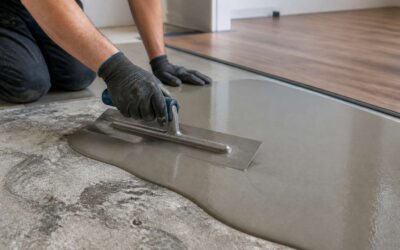
Pouring a concrete floor in kitchen renovations is a lesson in patience. The mix must be workable but not soupy. You want a consistency that holds its shape without fighting your trowel. In South Africa’s heat, the window between too stiff and too wet shrinks fast. Work in small bays, not one large pour. This keeps the edges from drying before you finish them.
Once the concrete is down, the curing ritual begins. Mist the surface, cover it with plastic, and resist the urge to walk on it for at least 48 hours. Concrete does not harden by drying; it hardens by hydration. Starve it of water and you get a dusty, weak slab that will haunt your kitchen forever.
The order on site matters:
1. Check the mix slump before pouring.
2. Screed to level using a straightedge.
3. Float the surface once bleed water disappears.
4. Trowel until it reaches a smooth, closed finish.
That sequence separates a durable concrete floor in kitchen from one that cracks like a dried up riverbed.
Sealing and Topcoats
The concrete floor in kitchen asks for one final act of care before it earns its place in your home. Sealing is not a luxury, it is a shield. After curing, the surface still holds pores that collect grease and wine. A good sealer closes those entry points.
Preparation matters as much as the product. Vacuum every speck of dust, then wipe with a damp cloth. A dry floor is essential. In Cape Town’s coastal air or Joburg’s highveld dust, the sealant behaves differently, so check the humidity before you begin!
- Test a small patch first
- Apply thin, even coats
- Wait for full cure between layers
Topcoats range from satin to high gloss, each changing how light moves across the slab. The concrete floor in kitchen becomes a surface that rewards slow work and steady hands.
Durability and Maintenance
Resistance to Stains and Spills
Every day, oil, acidic fruit, and hot cookware test a kitchen surface. A concrete floor in kitchen withstands this punishment with a dense, unyielding structure. The surface density prevents moisture from penetrating, so stains remain superficial and lift away with a standard cleanser. Consider the typical culprits:
- Red wine
- Turmeric
- Balsamic vinegar
None of these leave a permanent mark! My favourite aspect is the absence of grout lines; that territory where grime collects is gone. Practical upkeep requires only a swept floor and a periodic damp mop to maintain its original state. Those who fear daily chaos will find a rare composure here.
Scratch and Impact Considerations
Concrete floors often get praised for their hardness, but the real test is the relentless cycle of kitchen work. A kitchen sees dropped pans, scuffing boots, and the persistent scrape of a chair leg.
Consider the sheer density of a properly cured slab. This intrinsic hardness means a concrete floor in kitchen resists scratches that would mar softer materials. I have seen kitchens where the surface shrugs off a dropped cast iron skillet with only a faint, almost imperceptible mark. Scratches from grit and gravel stay superficial.
Maintenance is straightforward. No special polishes are needed. A quick sweep removes the abrasives before they become a problem.
Impact resistance, however, depends on the slab’s thickness and reinforcement. A well-constructed base absorbs shock without spalling.
– Dropped jars rarely shatter on contact.
– Heavy appliances roll without leaving pressure dents.
– Scratches from pet claws are virtually non-existent.
This is not a brittle tile that cracks with a sudden blow. A concrete floor in kitchen earns its keep through this simple, dependable behaviour.
Daily Cleaning Best Practices
A kitchen floor survives more foot traffic per square metre than most municipal sidewalks, yet a concrete floor in kitchen endures this with quiet composure. The daily rhythm of cooking, however, leaves its own residue: flour dust, oil splatter, and the stubborn film of steam-borne grease.
Cleaning this surface is a lesson in restraint. Warm water and a pH-neutral soap handle most residue without dulling the finish. I find a soft-bristle broom outperforms any mop for loose grit, since dragging damp fabric across the slab only grinds particles into the pores.
- Wipe spills within an hour to prevent etching from acidic juices.
- Use a microfiber flat mop for weekly damp mopping.
- Rinse the mop head twice to avoid redistributing soap film.
The true strength lies in the slab’s density, which sheds water and resists abrasion. A concrete floor in kitchen demands ten minutes of attention daily, not a weekend of scrubbing. Give it that, and it forgives the morning rush.
Periodic Resealing and Repairs
Most homeowners remember the first sealer application but forget the second. A concrete floor in kitchen requires a refresh every two or three years, depending on foot traffic and the cleaning products you use. The tell is easy to spot: water no longer beads on the surface.
When that happens, clean the slab thoroughly and apply a fresh coat of penetrating sealer. Topical coatings need more frequent attention, often every six to twelve months.
Repairs are different from resealing. Cracks in a concrete floor in kitchen should be filled with a flexible polyurea compound, not rigid mortar. Chips along edges can be patched with a cementitious filler, then tinted to match the existing finish.
A simple maintenance checklist helps:
- Inspect joints and cracks quarterly
- Check for water absorption spots monthly
- Test sealer performance with a few drops of water
These habits keep the slab stable for decades.
Comfort and Acoustics
Temperature and Radiant Heating
Concrete is cold. A plain concrete floor in kitchen can make your feet feel icy. Radiant heating changes that by embedding warm water pipes directly into the slab. This system warms the surface from below, delivering even, consistent heat that doesn’t dry the air or stir up dust.
Acoustics present a separate challenge. Hard surfaces like concrete amplify sound, so the clatter of pans becomes loud and echoey. You can tame this with several strategies:
- Lay down woven rugs near workspaces to absorb impact noise.
- Install a cork underlayment during the pour to dampen sound transmission.
The thermal mass of a concrete floor in kitchen also works passively. It stores warmth from sunlight or the oven and releases it gradually, smoothing out temperature dips during winter evenings. Pair this with an area rug near the sink to keep your feet happy while you cook.
Sound Absorption and Rugs
Ever stood on a concrete floor in kitchen and heard every dropped spoon ricochet off the walls? That sharp, metallic echo can turn a calm morning into a cacophony. The hard surface reflects sound waves instead of absorbing them, so pots clatter and footsteps ring out. But comfort doesn’t have to go out the window. A few strategically placed textiles change the entire auditory experience:
– Lay a dense, woven rug in front of the sink to catch drips and muffle dishware.
– Use a rubber backed mat under the prep zone to prevent sliding and dampen vibrations.
– Set a runner down the main traffic path to break up long sound corridors.
These soft additions also give your feet a reprieve from the cold slab. The concrete floor in kitchen stays the design anchor, but the rugs do the quiet work of making the room feel lived in, not just exposed.
Ergonomics and Standing Fatigue
Standing on a concrete floor in kitchen for eight hours is not the same as standing on a wooden deck. The slab’s absolute rigidity forces your pelvis to tilt slightly forward, which tightens the hip flexors and compresses the lumbar discs. Research from the University of Cape Town’s physiotherapy department shows that workers on hard surfaces report 40% more lower back discomfort than those on cushioned mats.
The body’s natural shock absorbers, the intervertebral discs, lose their sponginess under constant pressure. This is why even a simple anti-fatigue mat, with its subtle give, can change your posture. The concrete floor in kitchen remains the durable base, but your joints negotiate with it every second. Fatigue is not simply tiredness; it is the body’s signal of prolonged compression.
Cost and Resale Value
Upfront Material and Labor Costs
A poured concrete floor in kitchen can cost between R450 and R900 per square meter in Johannesburg! That range alone separates serious buyers from casual browsers. The upfront material costs cover cement, aggregates, and admixtures.
Labor dominates the bill, especially for skilled trowellers who guarantee a flat, crack-free finish. Resale value hinges on execution. A flawlessly levelled slab with a subtle sheen attracts buyers looking for industrial minimalism. An uneven surface repels them immediately. These cost drivers matter:
- Material grade and pigment loads
- Crew experience and curing duration
- Site access and existing slab condition
The investment pays off only when the contractor’s reputation matches the price. In South Africa’s property market, a durable, low-maintenance concrete floor often shortens the selling cycle. Overpricing a mediocre finish will stall offers.
Comparing to Tile and Wood
Tile and wood prices in Johannesburg fluctuate with supply chains and load shedding, but a concrete floor in kitchen remains a stable investment. Tile cracks at the grout lines within a decade. Wood warps near the sink. Concrete holds its surface when the crew knows what they are doing.
Buyers in South Africa weigh replacement cost. A concrete floor in kitchen outlasts both materials by decades, which shortens the negotiation gap. Resale value depends on the finish. A dull slab drops perceived value below tile. A honed slab beats laminate wood on durability.
- Tile replacement requires removing the old bed.
- Wood sanding and refinishing happens every five years.
- Concrete needs resealing every three to five years.
That list changes the math. The long term maintenance cost falls below what most homeowners expect from engineered wood.
Long-Term Value and Home Appeal
In Johannesburg’s resale market, a concrete floor in kitchen can shift a buyer’s first impression faster than any cabinet upgrade. The cost conversation is straightforward: a basic slab costs less than premium tile, but the long term value comes from not replacing it. Buyers ask about sealing. They ask about cracks. They ask what the previous owner did to protect it.
The home appeal angle is separate from finish trends. A honed concrete floor in kitchen suits the highveld light. It stays cool in summer. It does not show the dust that settles on darker surfaces. That practical appeal holds weight with buyers who have lived through load shedding and water restrictions.
- Replacement frequency: tile every decade, wood every five years, concrete resealed every three to five years.
- Resale perception: dull slabs undercut asking price; sealed or honed slabs hold it.
- Time saved: no sanding, no grout repair, no sink-side warping.
A well maintained floor shortens the negotiation gap. A neglected one widens it. The finish is the deciding factor.
Budget-Friendly Alternatives
Cheap concrete floors fail at resale when they look cheap. A thin overlay on an existing slab costs a fraction of a full pour, yet it still delivers the thermal mass that makes a concrete floor in kitchen comfortable through Johannesburg summers. Buyers respond to a sealed, even surface, not the thickness. Overlays with a light aggregate finish offer durability without the expense of polishing. A basic trowel finish with a decent sealer reads as intentional rather than forgotten.
- Consistent colour across the slab
- No visible patches or repair lines
- A matte or honed texture that hides dust
Resale value depends on perceived maintenance, not installation method. A concrete floor in kitchen with hairline cracks or patchy sealing undercuts offers, regardless of original cost. Budget alternatives work when the finish looks deliberate. Spend on a quality penetrating sealer, not on decorative extras.
Regional Price Variations
In Polokwane, a concrete floor in kitchen might cost R350 per square metre. In Cape Town, the same install runs closer to R650. A concrete floor in kitchen is not priced by its thickness. It is priced by labour, transport, and the coastal climate that demands extra sealing coats.
Resale value shifts by region. Buyers in Johannesburg pay for an even, sealed surface. Buyers in Durban pay for moisture resistance. The price gap shows in every quote, but resale power comes from matching local expectation.
- Labour rates in the Western Cape run 20% higher than in the Free State.
- Coastal-grade penetrating sealers cost R150 more per litre.
- Homeowners who document their sealer maintenance get firmer offers.
A cheaper install in a high-end suburb reads as a warning. The same finish in a middle-market area passes without comment. A sealed, even surface, whatever the regional price, remains the strongest resale lever.
Return on Investment Expectations
The return on a concrete floor in kitchen often outpaces the initial outlay. Sellers in Gauteng recover up to 70% of the installation cost through a higher asking price. Buyers read a sealed, level surface as a sign of structural care. They assume the slab beneath is sound, which shortens negotiation time.
There is a quiet arithmetic to this market. A mid range installation costs around R480 per square metre. The same floor adds R750 per square metre to a home’s perceived value in a desirable suburb. That gap, roughly 56%, is the true return.
Buyer behaviour follows predictable patterns:
- Documentation of sealer maintenance increases offer confidence.
- A neutral, sealed finish attracts the widest pool of prospective buyers.
- Consistency across the floor removes repair allowances from buyer budgets.
The concrete floor in kitchen becomes a quiet negotiation lever. It does not shout. It convinces.


0 Comments