Assessing the Floor and Planning the Lift
The first mistake most homeowners make is rushing the job. You cannot fix an uneven floor with a trowel and good intentions. The lift requires a precise diagnosis before any mix gets poured.
Start by examining the existing surface for movement, cracks, or old patches that might hide a bigger problem. You need to know what you are lifting. Check the slab thickness, the presence of waterproofing, and the location of any embedded services. This is the unglamorous homework that saves you from a costly failure later.
For a project this size, you should assess a few key factors:
– The structural integrity of the current concrete slab
– The height of adjoining rooms and door thresholds
– The location of drainage slopes, especially in garages or sculleries
South African conditions, from Highveld temperature swings to coastal humidity, can affect curing. Plan the pour accordingly. A smooth result depends on your patience during this planning phase. Understanding how to raise concrete floor 1 inch starts with knowing exactly what is underneath you. Precision here prevents problems later.
Preparing the Surface for the Overlay
Nobody wants a wavy floor or a topping that pops loose after the first summer thunderstorm. The secret to a successful overlay starts long before you mix anything. In fact, how to raise concrete floor 1 inch depends entirely on the prep work you do today. I have watched homeowners skip this stage and pay for it dearly with cracked, hollow sections.
Your slab needs a clean, open surface. Sweep away all debris, then attack any oil stains or old paint with a quality degreaser. A pressure washer works wonders, but do not stop there. The concrete also needs a mechanical profile so the overlay can bite into it.
- Grind the slab with a diamond grinder for a consistent, porous finish
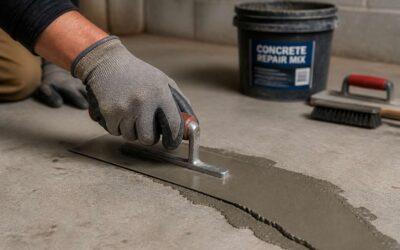
- Patch larger cracks and spalls with a repair mortar and let it cure fully
- Vacuum every last bit of dust from the surface
Finish by dampening the slab and applying a bonding agent. This simple routine transforms a tired, slippery floor into a fortress ready for its new layer.
Mixing and Pouring the Self-Leveling Compound
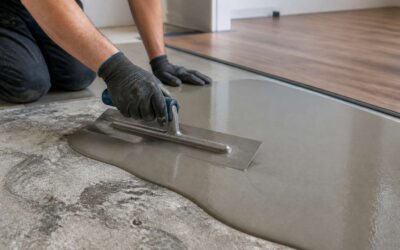
A single inch of concrete separates a crooked floor from a level one. In Johannesburg, I have watched homeowners stare at a sloping floor and wonder if it can be fixed. Mixing the self-leveling compound turns that worry into action. Read the manufacturer’s instructions with absolute attention. Use a drill and paddle mixer to blend the powder into cold water, working in small batches. The consistency should be fluid, not a sticky paste.
Pour it immediately! Start at the farthest corner and let it find its own level. For a full inch, you will need several bags, so stage them nearby. This is the sequence I trust:
- Measure the water precisely.
- Add the powder slowly to avoid lumps.
- Mix for three minutes, scraping the sides.
Then pour with confidence. I have seen how to raise concrete floor 1 inch transform a wobbly home into a stable one. The compound flows out, finds its balance, and sets a new standard for your space.
Finishing and Curing the Raised Surface
I have watched DIY projects fail at the final stage. The fresh topping looks smooth, so you walk away, and then it cracks! That is the reality of skipping proper curing after you work out how to raise concrete floor 1 inch. The finish and the cure decide whether the slab lasts a season or a decade.
Once the mix is level, resist the urge to trowel it dry. A steel float is too aggressive when the moisture starts to leave. Instead, wait for the sheen to disappear, then smooth it once with a magnesium float. This closes the surface without drawing up water.
- Start misting the slab as soon as it holds a footprint.
- Cover it with wet hessian or plastic sheeting.
- Keep it damp for at least 48 hours.
In the Highveld dry air, the surface can lose water in hours. Curing is not a suggestion; it is a chemical requirement. Another coat of water at dawn and dusk makes all the difference. Learn the process of how to raise concrete floor 1 inch properly, and respect the drying time.


0 Comments