Understanding the Need to Raise a Concrete Floor for Tile Installation
Reasons for Raising a Concrete Floor – Addressing uneven surfaces, height adjustments, and leveling for aesthetic or functional purposes
Understanding the need to raise a concrete floor for tile is akin to orchestrating a silent transformation—one that ensures beauty and durability dance in perfect harmony. When surfaces are uneven, cracks, dips, and rises disrupt the visual melody, leaving a space that feels unbalanced and uninviting. Elevating a concrete floor for tile becomes a crucial act of restoration, allowing the new surface to sing with smoothness and elegance.
Reasons for raising a concrete floor extend beyond mere aesthetics; they address functional concerns too. Whether it’s to correct height discrepancies, improve drainage, or create a level foundation for intricate tile patterns, raising the concrete transforms chaos into order. This process might involve adding a screed or self-levelling compound, meticulously layered to achieve a flawless base.
- Addressing uneven surfaces
- Adjusting height discrepancies
- Creating a level foundation for enhanced aesthetic appeal
The journey of learning how to raise concrete floor for tile is a dance of precision and patience, ensuring each step elevates the space’s inherent charm and structural integrity.
Signs That Indicate the Need for Raising the Floor – Cracks, dips, unevenness, and prior water damage
Concrete floors often hide secrets beneath their surface—cracks, dips, and signs of water damage that whisper tales of neglect or shifting foundations. Recognising these indicators is essential when considering how to raise concrete floor for tile. If left unaddressed, uneven surfaces can cause tiles to crack or become loose over time, transforming a sleek finish into a costly nightmare. The subtle imperfections—like hairline fractures or slight dips—may seem insignificant but can undermine the entire tiling project.
Water damage, in particular, is a silent culprit that weakens the integrity of the concrete. Moisture infiltration leads to cracks and unevenness, making it clear that elevating the floor is not just a matter of aesthetics but a necessity. When these issues are present, it’s time to take action, ensuring the foundation is solid before laying new tiles. Knowing how to raise concrete floor for tile becomes a crucial part of the process, especially when addressing these underlying problems.
Planning Your Concrete Floor Raising Project
Assessing the Existing Floor Condition – Tools needed, inspection tips, identifying weak points
Raising a concrete floor for tile installation isn’t a task to be taken lightly. Before diving in, it’s essential to understand the current condition of your floor. A thorough assessment can save you time, money, and headaches down the line. Did you know that many flooring issues stem from overlooked weak points or hidden damage? Proper planning begins with inspecting the existing concrete carefully.
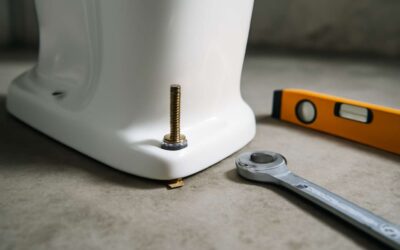
Tools needed for this project include a level, straightedge, pry bar, and a sturdy flashlight. These help identify dips, cracks, and areas of water damage that might compromise the integrity of the raise. When inspecting, look for signs of unevenness, soft spots, or crumbling concrete—these are your red flags. Pay particular attention to joints and corners, as these often reveal underlying issues. Identifying weak points early on allows you to determine whether to add supportive layers or reinforce the base before raising the floor. This step is crucial in ensuring a long-lasting, level surface for your tile installation.
Calculating the Required Height Increase – Measuring current height, desired level, compliance with building codes
Planning your concrete floor raising project requires precision and careful measurement. The first step is to accurately determine the current height of your floor. Using a reliable level and straightedge, you can gauge the existing surface with clarity. Next, establish the desired level, considering both aesthetic preferences and functional needs. It’s vital to ensure your plans align with local building regulations, which often specify minimum height requirements and safety standards for flooring.
Understanding how to raise concrete floor for tile involves calculating the exact height increase needed to achieve a perfectly level surface. This often means measuring multiple points across the room to identify variations. An effective method is to mark these measurements clearly and then determine the average height difference. Sometimes, a simple subtraction of the current height from your target height reveals the total amount of material needed—whether it’s self-levelling compounds, mortar beds, or additional concrete layers.
This careful approach not only guarantees a smooth, level foundation but also respects the integrity of your space, ensuring your tile installation stands the test of time.
Gathering Necessary Materials and Tools – Concrete mix, leveling compounds, reinforcement mesh, shovels, trowels, safety gear
In the shadowed corners of construction, the quest to learn how to raise concrete floor for tile can feel like a journey into the unknown. Gathering the right materials and tools is the first step into that darkness, where precision and patience are your only allies. Without the proper gear, the endeavour risks becoming a nightmare of uneven surfaces and compromised integrity.
To forge a stable and level foundation, assemble an arsenal that includes concrete mix, levelling compounds, reinforcement mesh, and essential hand tools—shovels, trowels, and safety gear. Safety should never be sacrificed; sturdy gloves, goggles, and dust masks guard against the unseen hazards lurking within raw materials.
Once equipped, consider the process as an intricate dance—each element must harmonise to create a seamless, durable surface. An ordered approach often involves
- preparing the existing slab
- applying reinforcement mesh for strength
- layering the chosen compound to fill the voids and elevate the floor
With patience, your darkened chamber of concrete transforms into a sanctuary fit for resilient tiles to rest upon—an unyielding base to withstand the relentless march of time. Knowing how to raise concrete floor for tile is an art of precision, patience, and subtle mastery.”
Preparing the Workspace for Elevating the Floor
Clearing the Area – Removing furniture, fixtures, and debris
Creating a pristine canvas for your new tile begins with an immaculate workspace. Clearing the area of furniture, fixtures, and debris isn’t merely practical—it’s essential. Every obstacle can hinder the precision necessary for a successful floor elevation. When you know how to raise concrete floor for tile, the first step often involves meticulous preparation of the environment, ensuring a stable foundation for your project.
A cluttered space can magnify issues down the line. For this reason, removing everything—from bulky sofas to delicate light fixtures—is a vital step. It’s akin to clearing the stage before a grand performance; only then can the craftsmanship unfold with grace and accuracy. As you prepare, consider the following:
- Empty the room completely, including all furniture and removable fittings.
- Dispose of or store debris, dust, and any loose materials that could compromise the work.
- Inspect for potential hazards or weak points that might need addressing before elevating the floor.
With the area cleared, your workspace transforms into a blank slate, ready to welcome the structural adjustments that will make your tiled floor both durable and beautiful. The clarity achieved in this phase lays the foundation for a flawless finish—an artful blend of function and form in every step of how to raise concrete floor for tile.
Surface Preparation – Cleaning the existing floor, repairing cracks, removing loose concrete
Before embarking on the transformative journey of elevating a concrete floor for tile installation, meticulous preparation of the existing surface is paramount. This phase is more than mere maintenance; it is the foundation upon which durability and aesthetic refinement hinge. An unclean or compromised floor can sabotage even the most precise craftsmanship, leading to cracks, unevenness, or future instability. Therefore, understanding how to raise concrete floor for tile begins with a thorough cleaning of the existing surface.
Begin by removing all loose debris, dust, and any remnants of previous coatings. Scrubbing the surface with a stiff brush and a suitable cleaner ensures that no particles undermine the adhesion of subsequent layers. Next, inspect the floor carefully for cracks or weak spots. These imperfections must be repaired to prevent future issues that could compromise the elevation process. Small cracks can be filled with a high-quality concrete repair compound, while larger flaws may require patching or even partial removal if the underlying structure is compromised.
Removing loose concrete is a crucial step that often goes overlooked. Use a chipping hammer or grinder to eliminate any unstable sections, creating a uniform, solid base. This process not only enhances the bonding surface but also allows for a more precise assessment of how to raise concrete floor for tile, ensuring every layer added adheres seamlessly. When these foundational repairs and cleaning measures are executed with care, the path to a level, durable, and aesthetically pleasing tiled surface becomes clear and achievable.
Ensuring Safety Measures – Protective equipment, ventilation, securing the workspace
Raising a concrete floor for tile installation is a task that demands not only technical skill but also a keen eye for safety. The first step in this process is preparing the workspace properly to prevent accidents and ensure a smooth project progression. Safety equipment—such as gloves, goggles, and dust masks—should be non-negotiable. These protect against dust, debris, and potential splinters that can occur during grinding or chipping.
Good ventilation is equally essential, especially when working with concrete dust or chemical admixtures. Open windows and use fans to maintain airflow, reducing inhalation risks. Before starting, clear the area of all furniture, fixtures, and loose debris to create a clutter-free environment. This not only keeps the workspace safe but also allows for better access and more precise work. Remember, thorough workspace preparation is the foundation for successfully learning how to raise concrete floor for tile, ensuring both safety and quality in the final outcome.
Methodology for Raising the Concrete Floor
Applying a Base Layer – Creating a sturdy foundation with gravel or mortar bed
Raising a concrete floor for tile installation isn’t merely a matter of adding material; it’s a delicate dance of precision and purpose. To create a stable base, the initial step involves applying a robust layer of gravel or mortar bed that acts as the foundation for the entire structure. This base layer is vital—it absorbs movement, prevents future cracks, and ensures the longevity of your new tiled surface.
Choosing the right materials is paramount. For a durable and level surface, many professionals recommend a combination of compacted gravel topped with a layer of mortar. The gravel provides drainage and stability, while the mortar fills in gaps and creates a uniform plane. When learning how to raise concrete floor for tile, it’s essential to consider the following:
- Properly compact the gravel to prevent settling over time
- Apply the mortar bed in manageable sections to ensure evenness
- Use a long level or laser tool to check for consistent height
By meticulously preparing this base layer, you lay the groundwork for a flawless tiled finish that resists movement and wear. The process demands patience, precision, and an eye for detail—elements that elevate the practical knowledge of how to raise concrete floor for tile into an art form that withstands the test of time.
Pouring Concrete or Self-Leveling Compound – Step-by-step process, mixing ratios, pouring techniques
Raising a concrete floor for tile installation is an art that demands meticulous technique and unwavering precision. The core of this process lies in the methodology of pouring concrete or self-leveling compound—an often overlooked yet critical step in ensuring a flawless finish. When learning how to raise concrete floor for tile, understanding the nuances of mixing ratios and pouring techniques can make all the difference between a stable surface and a future nightmare of cracks and unevenness.
Begin with a carefully prepared mix. For traditional concrete, a common ratio involves one part cement to three parts sand, with added gravel for stability. Self-leveling compounds, however, typically require a specific mix ratio—commonly 25kg of powder to around 6 litres of water—adhering strictly to manufacturer guidelines for optimal flow and setting. The key to success is in the pouring technique: pour the mixture slowly from one corner, allowing it to spread naturally, then use a smoothing trowel or a long straightedge to level the surface. For larger areas, employing a laser level or spirit level ensures consistent height and prevents unwanted dips or slopes.
- Ensure the substrate is thoroughly cleaned and primed before pouring.
- Work in manageable sections to maintain control over the flow and level of the compound.
- Allow ample curing time—generally 24 to 48 hours—before proceeding to tile installation.
Mastering these details in the pouring process transforms the challenge of how to raise concrete floor for tile into a precise craft—an essential step that underpins the durability and aesthetic appeal of your tiled surface for years to come. Patience, a keen eye, and adherence to this methodical approach will ultimately deliver a foundation that stands the test of time, resisting cracks and uneven wear.
Using Shims or Gravel for Incremental Thickness – When and how to incorporate shims or gravel beds for precise height adjustments
Raising a concrete floor for tile installation is often a delicate balancing act, especially when precise height adjustments are required. Incorporating shims or gravel beds for incremental thickness provides a reliable solution for achieving the perfect level surface. This methodology is particularly useful when dealing with uneven subfloors or when subtle height modifications are necessary to meet building standards.
The process begins with a thorough assessment of the existing floor to determine where and how much height needs to be added. Shims, typically made of wood, plastic, or metal, can be strategically placed beneath the gravel bed to fine-tune the elevation. Gravel beds, on the other hand, serve as a sturdy, adaptable base that can be easily levelled and compacted in stages. This approach allows for incremental adjustments — a crucial step in understanding how to raise concrete floor for tile without creating future issues.
When employing shims or gravel, it’s essential to work in stages, gradually building up the height and checking progress frequently. Use a spirit level or laser level to ensure consistency across the entire surface. For larger areas, a common practice is to lay down a base layer of gravel, then insert shims underneath, adjusting as needed before finalising the layer with a self-leveling compound or concrete.
- Ensure each layer is properly compacted before proceeding to the next.
This incremental approach not only guarantees a more precise height adjustment but also enhances the stability of the new surface, making it ideal for subsequent tile installation. Knowing when and how to incorporate shims or gravel beds for raising a concrete floor for tile can turn a challenging project into a straightforward task — one that results in a durable, level foundation for your tiled surface.
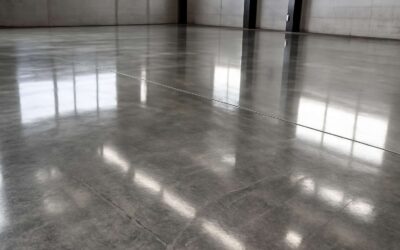
Ensuring Proper Levelness and Compacting – Tools and techniques for leveling, vibration tools
Achieving a perfectly level concrete floor is often a meticulous dance between precision and patience. When learning how to raise concrete floor for tile, understanding the nuances of proper leveling and compaction is paramount. Using specialised tools such as vibratory plates, tamps, and laser levels, you can ensure each layer is uniformly compacted, reducing the risk of future cracks or unevenness. The vibratory tools help eliminate air pockets and settle the material, creating a stable, dense base that will stand the test of time. Proper surface preparation, including thorough cleaning and crack repairs, prepares the substrate for a resilient foundation.
In this process, employing a combination of gravel beds and shims allows for incremental height adjustments, making the entire endeavour more manageable. For larger areas, a staged approach—layering gravel, inserting shims, then compacting—can transform a rough, uneven surface into a precise, level platform ready for tiling. The key lies in consistent checks with spirit or laser levels, verifying that the elevation remains even across the entire surface. Mastering how to raise concrete floor for tile through careful layering and effective use of vibration tools results in a durable, flat foundation that ensures your tiles will last for years to come.
Finishing and Curing the Raised Floor
Smoothing the Surface – Troweling methods, finishing techniques
Finishing and curing the raised concrete floor for tile is a crucial phase that determines the longevity and appearance of the final installation. Achieving a smooth, durable surface requires meticulous attention to detail during the troweling process. As the concrete begins to set, using the right troweling method can make all the difference. Initial troweling should be performed when the surface firms up but remains workable, ensuring a firm, flat finish. For a polished, professional look, a second, finer trowel pass helps to eliminate surface imperfections and produce an even plane.
Smoothing the surface is often best accomplished with a steel trowel, which offers superior control and a sleek finish. Applying consistent pressure and overlapping each pass ensures uniformity across the entire surface. Sometimes, it’s beneficial to use a magnesium float in the early stages to bring excess moisture and aggregate to the surface, creating a more refined finish. After troweling, a curing process is vital—covering the floor with plastic sheeting or curing compounds helps prevent rapid moisture loss, reducing the risk of cracks and surface defects. Proper finishing and curing are essential steps in how to raise concrete floor for tile, ensuring a stable, level base for your tiled surface to thrive.”
Allowing Proper Curing Time – Time frames, environmental conditions, curing methods
Patience is the silent artisan in the craft of how to raise concrete floor for tile; it transforms an uneven slab into a steadfast foundation. Proper curing time isn’t just a recommendation—it’s the heartbeat of a durable, flawless surface. Typically, concrete needs a minimum of 7 days to cure sufficiently, but in optimal conditions, a full 28 days allows the moisture to settle and the chemical reactions to complete their symphony. During this period, maintaining consistent environmental conditions—moderate temperature, low humidity, and minimal disturbance—ensures the curing process unfolds unperturbed.
To enhance the curing process, many professionals advocate for covering the freshly poured concrete with plastic sheeting or applying curing compounds, which help retain moisture and prevent rapid drying that leads to cracks. Remember, a well-cured floor is the bedrock of a successful tile installation. When raising a concrete floor for tile, patience and attentiveness to curing time are the unseen artisans shaping a surface that will stand the test of time. Properly curing the slab creates a stable, level canvas, elevating your project from mere construction to an enduring work of craftsmanship.
Addressing Surface Imperfections – Sanding, patching cracks, final smoothing
Transforming a rough, uneven slab into a flawless surface isn’t just about pouring concrete; it’s about the artistry of finishing and curing the raised floor to perfection. Once your concrete has been poured and levelled, attention turns to smoothing out surface imperfections. Small cracks and rough patches can mar the final look of your tile installation, so addressing these flaws early is essential. Sanding down rough spots with a fine-grit sander or using patching compounds to fill cracks ensures the surface is even and receptive to tiles.
Patience during this phase is vital. After patching, a thorough final smoothing with a trowel or float helps create a uniform bed. If necessary, incorporate a series of light sanding or grinding to achieve a polished finish that will support your tiles for years to come. Remember, the integrity of your raised concrete floor for tile depends on meticulous surface preparation—every detail, from filling tiny fissures to ensuring a smooth, level surface, plays a role in your project’s enduring success.
Preparing the Raised Floor for Tile Installation
Installing a Waterproof Membrane – Importance, types, installation tips
When preparing a raised floor for tile installation, installing a waterproof membrane is a critical step that often gets overlooked. A waterproof membrane acts as a barrier, preventing water infiltration that could damage the underlying structure or cause mould growth. Its importance cannot be overstated, especially in moisture-prone areas like bathrooms or kitchens. There are different types of membranes available, including liquid-applied, sheet membranes, and liquid rubber coatings, each suited to specific applications.
Applying a waterproof membrane requires careful attention to detail. Ensure the surface is thoroughly cleaned and free of debris before laying the membrane. Overlap seams generously and follow manufacturer instructions for curing times. For added durability, some installers incorporate a reinforcing mesh underneath the membrane, which helps prevent tears and enhances adhesion. Proper installation of this layer is vital to guarantee a long-lasting, moisture-resistant surface that complements the raised concrete floor for tile. This step ensures the tile adheres securely and remains resilient over time, even with exposure to water and foot traffic.
Applying a Thinset Layer or Leveling Compound – Ensuring a flat, bonded surface for tiles
Achieving a perfectly level surface is the cornerstone of any successful tile installation, especially when learning how to raise concrete floor for tile. A smooth, bonded surface not only enhances aesthetic appeal but also ensures the longevity of your tiles, resisting cracks and lifting over time. Applying a thinset layer or a high-quality leveling compound is often the most effective way to bridge imperfections and create a resilient base.
Start by thoroughly cleaning the existing concrete floor, removing dust, debris, and loose material that could compromise adhesion. For uneven areas, a self-leveling compound can be poured directly over the prepared surface, flowing into cracks and dips to establish a flat plane. When necessary, use shims or gravel beds to incrementally increase height, especially over large dips or when precise height adjustments are required.
During application, ensure the compound is spread evenly using a trowel or squeegee, and employ vibration tools to eliminate air pockets. Proper curing time is vital—environmental factors such as humidity and temperature influence drying, so patience is key. Once cured, the surface should be smooth and level, providing a robust canvas for the subsequent installation of waterproof membranes and tiles. Knowing how to raise concrete floor for tile with these meticulous steps guarantees a professional finish that withstands the test of time and foot traffic.
Choosing the Right Tile and Adhesive – Considerations for raised floors, compatibility
Embarking on the journey of transforming a humble concrete base into a thriving canvas for exquisite tiles demands more than just skill—it requires a touch of mastery in selecting the right materials. When considering how to raise concrete floor for tile, the choice of tile and adhesive becomes pivotal. The terrain must not only be level but also compatible with the selected bonding agents, ensuring durability that withstands the relentless march of time and foot traffic.
For raised floors, porcelain and natural stone tiles often emerge as champions, their resilience making them ideal for elevated surfaces. Equally crucial is the adhesive—epoxy-based or polymer-modified thinsets are preferred for their superior bonding qualities and flexibility. The adhesive must seamlessly integrate with the raised surface, providing a resilient grip that prevents lifting or cracking over years of use.
- Consider the thickness of the tile and the height adjustment needed
- Ensure the adhesive matches the substrate’s stability and moisture levels
- Verify the compatibility of the chosen tile with the existing or newly raised surface
When planning how to raise concrete floor for tile, remember that meticulous selection of the right tile and adhesive not only elevates aesthetic appeal but also fortifies the longevity of your installation. A harmonious marriage of materials and precise preparation transforms a simple raised floor into a masterpiece of craftsmanship and durability.
Additional Tips and Best Practices
Hiring Professional Help Versus DIY – Pros and cons, when to call experts
When considering how to raise concrete floor for tile, weighing the advantages and disadvantages of DIY versus hiring professionals is essential. For those with experience in concrete work, a DIY approach can be rewarding. It allows for hands-on control and often saves money. However, even skilled DIY enthusiasts must recognise the intricacies involved—ensuring proper surface preparation, precise measurement, and curing times are crucial for a durable result.
On the other hand, engaging expert help offers peace of mind, especially when dealing with complex structural adjustments or building code compliance. Professionals possess specialised tools and an eye for detail, which can prevent costly mistakes that might compromise the integrity of the raised floor. Consider the following factors before deciding:
- Complexity of the project and existing floor condition
- Availability of time and resources
- Budget constraints and long-term durability expectations
Ultimately, knowing when to call in the pros ensures that your project seamlessly integrates with the rest of your space—saving you from future headaches and delivering a flawless foundation for your new tile surface.
Common Mistakes to Avoid – Uneven leveling, improper curing, inadequate support
When embarking on the journey of how to raise concrete floor for tile, attention to detail can make all the difference between a flawless finish and a costly mistake. One common pitfall is uneven leveling, which can cause tiles to crack or shift over time, compromising the entire surface. Ensuring a perfectly smooth, level base requires patience and precision—rushing the process often leads to uneven support that undermines your efforts.
Proper curing is another critical aspect often overlooked. Inadequate curing not only weakens the concrete but can also lead to surface imperfections that are difficult to correct later. To avoid this, maintain consistent environmental conditions and allow sufficient curing time—typically at least 7 days—before proceeding with tiling. This guarantees a resilient foundation capable of supporting your new tiles without future issues.
Additionally, avoid the mistake of inadequate support when raising a concrete floor for tile. Using shims or gravel beds correctly can help incrementally adjust height and ensure solid support underneath. Remember, a stable and well-supported base is essential for long-lasting, beautiful tile finishes. Think of it as laying the groundwork for a masterpiece—every detail counts!
Maintenance Tips for Raised Floors – Long-term care, preventing future issues
Long-term care of your raised concrete floor for tile isn’t just about maintenance; it’s about preserving the integrity of your investment. Over time, environmental factors and heavy foot traffic can cause subtle shifts or wear that compromise the stability of your base. Regular inspections help catch issues early—cracks or uneven patches indicate the need for minor repairs before they escalate.
One simple yet effective maintenance tip is to keep the surface clean and free from debris, which can trap moisture and lead to surface deterioration. Applying a breathable sealant periodically can also protect against water infiltration, especially in high-moisture environments. Remember, a raised floor that’s well-kept prolongs its lifespan and keeps your tile installation looking pristine for years to come.
To prevent future issues, it’s wise to periodically check the levelness of your surface using a long spirit level or laser device. If you notice any dips or cracks, addressing them promptly can save you from costly repairs later. For those considering how to raise concrete floor for tile, understanding these maintenance essentials ensures your work remains durable and visually appealing long after the initial project is complete.


0 Comments