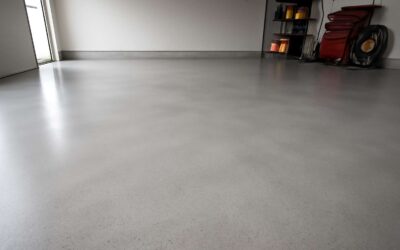
Understanding the Importance of a Level Concrete Floor
What is a Level Concrete Floor?
A level concrete floor isn’t just about appearance; it’s the foundation for safety and durability. An uneven surface can lead to cracks, trips, and compromised structural integrity. Understanding how level a concrete floor needs to be is crucial for both residential and commercial projects. A truly level floor ensures that everything from furniture to machinery operates smoothly, reducing long-term repair costs.
Achieving a perfectly level concrete floor involves assessing existing unevenness and employing precise techniques. Typically, this includes using tools like laser levels and straightedges to identify high and low spots. Remember, even minor deviations can cause significant issues down the line. For this reason, professional assessment is often recommended to ensure the floor meets industry standards and your specific needs.
- Structural stability
- Ease of installation for flooring materials
- Prevention of future damage and cracks
Why Leveling is Essential for Construction and Renovation
In the bustling world of construction and renovation, a surprisingly high percentage of structural issues can be traced back to one culprit: an uneven concrete floor. It’s almost as if the floor has a secret vendetta against your carefully planned interior! Properly understanding how level a concrete floor needs to be isn’t just about aesthetics; it’s about preventing costly repairs, ensuring safety, and making sure your new tiles or carpets actually stay put.
When you’re questioning how level a concrete floor, remember that even the slightest deviation can cause a domino effect—cracks, instability, and uneven wear. This is why professional assessment and precise leveling techniques are non-negotiable. Whether you’re laying a polished showroom or a cozy residential lounge, knowing the importance of a level concrete floor can make or break your project’s success. After all, a solid foundation isn’t just for castles—it’s the backbone of every successful build.
Common Issues Caused by Unlevel Floors
Uneven concrete floors are silent saboteurs within the structural integrity of any building, often lurking beneath the surface with insidious subtlety. When contemplating how level a concrete floor should be, it’s not merely about visual harmony; it’s about safeguarding the longevity of your entire project. A floor that isn’t properly leveled can be a breeding ground for persistent issues, quietly eroding the foundation of your work over time.
Common issues caused by unlevel floors include cracked tiles, uneven wear patterns, and instability that jeopardizes safety. These problems often manifest gradually, making them difficult to detect until they reach a critical point. The ripple effect can be devastating, leading to costly repairs and disruptive renovations. Recognizing how level a concrete floor needs to be is essential—every millimeter of deviation can set off a chain reaction of structural failures.
In fact, some of the most troublesome issues—such as creaking floors or shifting foundations—arise directly from improper leveling. This is why meticulous assessment and precise leveling techniques are indispensable. When you understand the importance of a level concrete floor, you’re not just ensuring aesthetic appeal but also reinforcing durability and safety. After all, a resilient foundation is the backbone of every successful construction venture.
Preparing for Floor Leveling
Inspecting the Existing Floor
Before tackling the task of how level a concrete floor, a thorough inspection of the existing surface is essential. Unseen cracks, uneven patches, or debris can sabotage your efforts from the outset. Take the time to examine the entire floor carefully, looking for high spots, low areas, and any signs of damage that might need addressing beforehand.
Using a long, straightedge or a laser level can help identify inconsistencies that aren’t immediately visible. Mark any problematic spots clearly so you know where to focus your repair efforts. Remember, a smooth, clean surface is the foundation for effective leveling. If the existing floor has significant cracks or holes, these should be repaired using suitable patching compounds before proceeding with the leveling process.
To make the process more efficient, consider creating a checklist that includes:
- Inspecting for cracks and damage
- Cleaning the surface thoroughly
- Marking uneven areas
- Assessing moisture levels
Gathering Necessary Tools and Materials
Preparing for floor leveling isn’t just about gathering tools—it’s about creating a foundation that guarantees success. A meticulous approach starts with assembling the right materials, because even the smallest oversight can lead to unforeseen complications. When asking how level a concrete floor should be, remember that precision begins long before the first pour or patch.
To tackle this task effectively, you’ll need an assortment of specialized tools and materials. Essential items include a durable trowel, a mixing bucket, a concrete float, and a high-quality leveling compound. For measuring and marking, a laser level or long straightedge becomes your secret weapon, revealing hidden imperfections that might otherwise go unnoticed.
- Leveling compounds suitable for concrete
- Water for mixing and cleaning
- Protective gear, such as gloves and masks
- Cleaning supplies to remove debris and dust
Ensuring you have everything on hand transforms a potentially daunting process into a seamless operation, where each element plays a pivotal role in how level a concrete floor will ultimately be. The process demands patience, but with the right tools, the path to a perfectly leveled surface becomes clear and achievable.
Clearing and Cleaning the Floor Surface
Before embarking on the journey to how level a concrete floor, one of the most vital steps is preparing the surface with meticulous care. A clean, debris-free foundation sets the stage for a flawless finish, ensuring that the leveling compound adheres seamlessly and performs optimally. Dust, loose particles, or stubborn stains can sabotage your efforts, causing uneven patches that undermine the entire project. Hence, the process of preparing for floor leveling demands a thorough sweep and a vigilant eye, making sure every speck of dirt is banished.
Once the surface is pristine, it’s wise to use a long straightedge or laser level to identify high and low spots. This initial inspection acts as a compass, guiding your application of leveling compound where it’s needed most. For larger surfaces, consider marking the uneven areas with chalk or a marker to visualize the scope of work. When discussing how level a concrete floor should be, remember that even minor imperfections can ripple into significant issues later. A careful, measured approach during surface preparation not only simplifies the process but also ensures your finished floor is perfectly even and stable, transforming a mundane task into a craft of precision and patience.
Methods to Level a Concrete Floor
Using Self-Leveling Compound
When faced with the challenge of how level a concrete floor, self-leveling compound becomes your secret weapon. This innovative material flows effortlessly into cracks and uneven spots, transforming a lumpy surface into a smooth canvas. Its quick-setting nature means you can achieve professional results with minimal fuss—perfect for both small repairs and large-scale renovations. The key lies in applying the compound correctly to ensure a flawless finish.
Start by pouring the self-leveling compound in the center of the floor and then spread it outward using a trowel or gauge rake. Gravity does most of the work, letting the compound settle into low spots naturally. For particularly uneven floors, consider using a spiked roller after pouring to help eliminate trapped air and ensure the compound levels evenly. Remember, the success of how level a concrete floor turns out hinges on proper preparation and application. Whether you’re preparing a garage or a commercial space, this method offers a seamless, durable solution that can make or break your project’s outcome.
Grinding and Smoothing the Surface
When striving to achieve the perfect horizontal harmony of a concrete surface, the method of grinding and smoothing the surface emerges as a symphony of precision and patience. This process transforms a rough, uneven floor into a sleek, polished canvas ready for any finish. In the realm of how level a concrete floor can be, grinding is often the secret weapon that unveils the true potential beneath the surface.
Starting with a high-quality concrete grinder, you methodically work across the floor, gradually removing high spots and revealing a uniform plane. The key lies in maintaining a steady pace, letting the abrasive discs do their magic while you monitor the surface for consistent flatness. For larger areas, an orbital grinder can help achieve an even, glossy finish—almost as if the floor is whispering its newfound levelness.
For intricate or particularly uneven surfaces, consider employing a combination of grinding and patching. First, grind the high spots to create a baseline, then fill in the low areas with a suitable leveling compound. Once dry, a second pass with the grinder ensures the surface is flawlessly smooth, revealing how level a concrete floor can truly become when approached with care and finesse.
In the end, whether you’re preparing a garage or a commercial space, the process of grinding and smoothing the surface not only enhances the aesthetic appeal but also ensures the longevity of your floor. It’s a dance of grit and grace, where every pass brings you closer to that perfect, level finish—transforming raw concrete into an artful foundation that’s ready for the next step in your project journey.
Pouring Additional Concrete or Overlays
When seeking to perfect the art of how level a concrete floor, sometimes the best solution is to add additional concrete or overlays. This method transforms uneven surfaces into a seamless, flat expanse, ready to support any finishing touch. Pouring additional concrete involves carefully applying a fresh layer — often called a topping — which fills in low spots and bridges gaps, creating a harmonious surface. It’s an artful dance of precision, requiring meticulous preparation to ensure the new layer bonds flawlessly with the existing slab.
For minor imperfections, overlays—thin layers of specialized concrete—are an elegant fix. These overlays can be tinted or textured, turning a utilitarian surface into a stunning feature. To achieve the desired levelness, professionals often use a screed or a laser-guided finishing tool, ensuring the overlay is perfectly flat and smooth. This approach not only elevates the aesthetic appeal but also prolongs the lifespan of your floor, making it a resilient foundation for years to come.
- Prepare the existing surface by thorough cleaning and roughening to promote adhesion.
- Mix the overlay material carefully, following manufacturer specifications for optimal consistency.
- Pour or spread the overlay evenly across the surface, working swiftly to prevent setting issues.
- Use a straightedge or laser level to guide the finishing process, ensuring an even, level surface.
Whether pouring additional concrete or applying overlays, the goal remains the same: to unlock the potential of how level a concrete floor can truly become. With patience and precision, each layer brings you closer to the flawless, resilient surface that’s ready for any purpose — from a bustling warehouse to a cozy garage.
Building Up Low Spots with Mortar
When faced with the challenge of how level a concrete floor, building up low spots with mortar often feels like giving your uneven surface a much-needed facelift. This method is surprisingly straightforward but demands patience and a keen eye for detail. The secret sauce? A high-quality, quick-setting mortar that bonds tightly without cracking or shrinking over time.
Begin by carefully removing loose debris and ensuring the low spots are clean and slightly roughened. Then, mix the mortar to a consistency that’s neither too runny nor too stiff—think peanut butter, not pancake batter. Using a trowel, place the mortar into the low areas, pressing firmly to eliminate air pockets and ensure a solid bond. For larger dips, consider applying the mortar in layers, allowing each to set before adding the next. As you work, periodically check your progress with a level or laser, because no one wants a floor that’s perfectly flat—except, perhaps, for a pancake!
To achieve a truly level surface, some professionals prefer to follow this process with a smoothing compound or a float, ensuring a seamless transition from mortar to existing slab. This technique turns that stubborn, uneven patchwork into a sleek, resilient foundation—ready to support whatever your project demands, from a bustling workshop to a cozy lounge.
Step-by-Step Guide to Level a Concrete Floor
Assessing and Marking Highs and Lows
Achieving a perfectly level concrete floor is both an art and a science—one that can dramatically transform a space. To begin, assessing the floor’s high and low points is crucial; this step ensures your entire project is built on a solid foundation. Grab a long, straightedge or a laser level and systematically scan the surface. As you do, mark any significant highs and lows with chalk or tape. This visual mapping is vital for understanding the scope of the task ahead and helps prevent surprises during the leveling process.
Next, it’s time to strategize your approach. For uneven floors, you might need to build up low spots with mortar or pour self-leveling compound to create a uniform surface. If the surface has high spots, grinding them down becomes necessary. Using a combination of these techniques, you can effectively bring the entire floor to a consistent elevation. Remember, patience and precision are key—skimming over the imperfections won’t suffice if your goal is a flawlessly level floor.
Applying the Chosen Method
Achieving a perfectly level concrete floor is a meticulous process that demands patience and an eye for detail. Once you’ve assessed and marked the highs and lows, the next step involves applying the chosen method with precision. Whether you’re utilizing self-leveling compound, grinding high spots, or building up low areas with mortar, each step must be executed carefully to ensure optimal results. The key is to work systematically, addressing one section at a time to maintain consistency across the entire surface.
For example, when using self-leveling compound, pour it gradually into the low spots, allowing it to flow naturally and fill every nook and cranny. Use a trowel or a smoothing tool to help spread the compound evenly, making sure it covers the marked lows without trapping air bubbles. If grinding high spots, adopt a gentle, controlled approach—over-aggressive grinding can create uneven patches or weaken the surface.
In cases where mortar is necessary, mix it to the right consistency and carefully build up the low areas, taking care not to add too much at once. Remember, the goal is to create a uniformly flat surface, so patience with each layer is essential. When applying these techniques, visual cues such as a straightedge or laser level become your best friend, guiding your efforts toward a flawless, level concrete floor that’s ready for the next stage of your project.
Verifying Floor Levelness
Verifying the floor’s levelness is crucial before finalizing your concrete floor. Even a slight deviation can compromise the entire project. To ensure precision, start by placing a straightedge or laser level across the surface. Look for gaps or high spots that need addressing. This step helps you identify areas where the concrete is uneven, guiding your next move.
- Mark high spots with chalk or tape
- Note low areas needing fill
- Check multiple points for consistent leveling
Once you spot the irregularities, you can decide whether to apply self-leveling compound, grind high spots, or build up low sections with mortar. This systematic approach guarantees that you know exactly how level a concrete floor is before proceeding. The key is thorough inspection—skipping this step risks uneven surfaces that could affect your entire project.
Tips and Best Practices for Effective Floor Leveling
Ensuring Proper Surface Preparation
When embarking on the journey to how level a concrete floor, the importance of meticulous surface preparation cannot be overstated. A truly even foundation begins long before the first pour or patch; it’s a dance of patience and precision. Ensuring the surface is free of debris, dust, and loose particles creates a blank canvas where the magic of leveling can unfold seamlessly. An unblemished surface allows the self-leveling compound or mortar to bond securely, preventing future cracks or unevenness from taking root.
For optimal results, consider these best practices: start by inspecting the floor for high spots and low areas, then mark them clearly. When applying methods to how level a concrete floor, always double-check your work with a reliable leveling tool, like a laser or long spirit level, to catch even the slightest deviation. Remember, a level foundation isn’t just about aesthetics; it’s the backbone of durability for any flooring project. Proper surface preparation is the secret ingredient in achieving a flawless, long-lasting finish that stands the test of time.
Choosing the Right Materials
Choosing the right materials is the cornerstone of how level a concrete floor that not only looks impeccable but also endures the rigors of daily life. A misstep here can turn a straightforward project into a saga of cracks and uneven surfaces. To ensure the best results, opt for high-quality self-leveling compounds designed specifically for concrete floors. These products promise a smooth, durable finish when applied correctly, transforming a potentially uneven slab into a flawless canvas.
When selecting materials, consider the unique conditions of your project—moisture levels, load expectations, and the existing surface’s condition all influence your choices. For instance, epoxy overlays can provide extra strength, while standard cementitious compounds suffice for lighter applications. Remember, good materials are the silent heroes in your quest to how level a concrete floor. A little investment here goes a long way in avoiding costly repairs down the line.
For added assurance, some professionals recommend preparing a small test patch before committing to the entire surface, allowing you to assess how the materials interact with your specific floor. Whether it’s a DIY endeavor or a professional undertaking, choosing the right materials is an art that marries science and intuition—ensuring your finished floor is truly level and resilient.
Working in Suitable Weather Conditions
Weather conditions can make or break your efforts when trying to how level a concrete floor. Humidity, temperature fluctuations, and even sudden rain can compromise the curing process, leading to uneven results. Working in suitable weather conditions isn’t just a suggestion—it’s a necessity for achieving a perfectly level surface. Clear, dry days with moderate temperatures provide the ideal environment for application and drying, reducing the risk of cracks and surface imperfections.
Additionally, avoid working during extreme weather—hot days can cause rapid drying, leading to surface cracks, while freezing temperatures hinder proper curing. If outdoor conditions aren’t ideal, consider scheduling your project during a more stable period or using temporary shelters. Ensuring the right weather conditions helps maintain the integrity of your material and guarantees that the floor remains truly level long after the work is done.
Remember, effective floor leveling hinges on patience and timing. Monitoring weather forecasts and planning accordingly can save you from costly rework and frustration. When you prioritize suitable weather, your efforts to how level a concrete floor will yield results that stand the test of time and daily wear.
Allowing Adequate Drying and Curing Time
Patience is often overlooked when it comes to achieving a perfectly level concrete floor, yet it remains the cornerstone of a durable, flawless finish. After the initial application, giving the floor ample time to dry and cure isn’t just about safety—it’s about ensuring long-term stability. Rushing this process can trap moisture or create surface imperfections, undoing all your hard work.
To promote optimal curing, it’s wise to keep the environment stable and free from disturbances. If you’re working in a dry, warm space, avoid walking on the surface prematurely, as footprints and minor disturbances can cause unevenness. For outdoor projects, adequate drying time is crucial—especially in South Africa’s varying climate conditions, where sudden rain or high humidity can sabotage your efforts.
Consider implementing a curing method such as covering the freshly poured floor with plastic sheeting or using curing compounds. This helps retain moisture and prevents rapid drying, which can lead to surface cracks. Remember, the goal is to allow the concrete to reach its full strength slowly and evenly, which makes the difference between a level floor that stands the test of time and one that develops unsightly cracks or dips.
Hiring Professionals vs. DIY
When it comes to achieving a flawlessly level concrete floor, the decision between hiring professionals and attempting a DIY approach often hinges on the project’s complexity and your confidence in handling the task. While DIY methods can seem tempting—especially if you’re eager to save costs—expert intervention often guarantees precision and longevity, essential for high-traffic or load-bearing surfaces. Professionals bring specialized tools and a keen eye for subtle imperfections, ensuring that the concrete’s surface is truly even.
For those who choose to tackle the project themselves, understanding the nuances of how level a concrete floor is can be a game-changer. Using laser levels or long spirit levels, you can identify high and low spots with remarkable accuracy. However, patience and meticulous preparation are vital—skipping steps or rushing the process can result in unevenness that’s hard to correct later. Remember, the key to a durable, level floor lies in consistent application and thorough surface preparation.
Whether you opt for professional help or a DIY route, always keep in mind that the environment plays a pivotal role. Protecting the work area from sudden weather changes—especially in South Africa’s unpredictable climate—can prevent surface imperfections. Ultimately, understanding how level a concrete floor is, and applying best practices, will help you create a foundation that not only looks immaculate but endures the test of time.
Common Mistakes to Avoid When Leveling a Concrete Floor
Skipping Surface Preparation
Skipping surface preparation when figuring out how level a concrete floor can lead to disastrous results. It’s a step many overlook in their rush to achieve a perfectly flat surface, but neglecting this crucial phase often results in uneven finishes, cracking, or even structural issues down the line. The key mistake is assuming that the existing surface is inherently suitable for leveling—nothing could be further from the truth.
One of the most common errors is failing to thoroughly clean and remove debris, grease, or loose particles. These contaminants compromise the adhesion of leveling compounds or overlays, creating weak spots that undermine the entire process. When working on how to level a concrete floor, attention to detail in surface prep is non-negotiable. Remember, a smooth, clean, and dry surface isn’t just recommended; it’s essential for a seamless, professional finish.
Additionally, skipping the step of repairing existing cracks or filling low spots can cause uneven settling or future damage. If these issues aren’t addressed beforehand, they can magnify once the leveling compound sets, resulting in a lopsided floor—precisely what you’re trying to avoid. In essence, the secret to a flawless, level concrete floor lies in meticulous surface preparation, not taking shortcuts or rushing the process.
Choosing Incorrect Materials
Choosing the correct materials when learning how to level a concrete floor can spell the difference between a stunning, durable finish and a frustrating, uneven mess. Using the wrong product—such as a self-leveling compound that isn’t suited for heavy-duty loads—can compromise the entire project. It’s tempting to grab the cheapest or most readily available option, but cutting corners with materials often leads to costly repairs down the line.
One common pitfall is selecting a leveling compound that doesn’t match the specific conditions of the floor—be it moisture levels, load-bearing requirements, or surface texture.
- For high-traffic areas, a robust, industrial-grade product is essential.
- In residential settings, a smooth, fast-curing compound might be preferred.
Failing to match the right material to the task at hand can result in cracking, delamination, or uneven settling. When learning how to level a concrete floor, the secret lies in understanding the unique needs of each project and choosing materials that align perfectly with those demands. Skipping this step is like trying to paint a masterpiece with the wrong brush—inevitably, the finish suffers.”
Rushing the Drying Process
In the shadowed corridors of renovation, time often becomes the silent assassin, rushing the drying process for the sake of expediency. Yet, this haste is a treacherous friend, whispering promises of swift completion while sowing the seeds of future chaos. When learning how to level a concrete floor, patience is the dark art that must be mastered; rushing drying times can lead to cracks, delamination, or uneven settling—imperfections that haunt long after the work is done.
To avoid such pitfalls, it’s vital to allow the concrete to cure fully, which can take several days depending on environmental conditions. Skipping this crucial step is like awakening a ghost before it’s ready—fragile, unpredictable, and prone to retribution. Remember, a well-cured floor is the foundation of all that follows, and rushing this process risks undoing every ounce of effort poured into achieving a perfectly level surface.
Ignoring Safety Guidelines
In the pursuit of a flawless, level concrete floor, stumbling over common mistakes can turn a promising project into a nightmare. One perilous error is neglecting the importance of safety guidelines; rushing or ignoring protective gear can lead to injuries or compromised results. When learning how to level a concrete floor, patience becomes your most faithful ally—hurrying can cause uneven surfaces, cracks, or delamination that mar the integrity of your space.
Another mistake often made is inconsistent surface preparation. Overlooking this step can result in poor adhesion of the leveling compound or overlays, ultimately jeopardizing the entire endeavor. For example, applying self-leveling compound over a dirty or greasy floor will hinder proper bonding, making the surface prone to future damage. Remember, meticulous inspection and cleaning are the bedrock of a successful leveling process.
- Failing to assess high and low spots accurately
- Using incompatible or poor-quality materials
- Rushing the drying and curing process, which can lead to future cracks and uneven settling
By avoiding these pitfalls and respecting the nuances of each step, you pave the way for a sturdy, perfectly level concrete floor that stands the test of time—a true foundation for any enduring renovation or construction project.


0 Comments