Understanding Concrete Floors and Thermal Insulation
The role of concrete as a flooring substrate
Across South Africa, heat loss through floors can account for a surprising portion of winter energy bills. Concrete’s natural thermal mass stores warmth, but without proper insulation it can also feel drafty and cold underfoot. A well-considered approach frames the concrete floor for insulation as a foundation for comfort, not a liability. When the substrate is planned with care, you enjoy steadier temperatures and rooms that feel cozier from the moment the thermostat is switched.
Key factors shaping performance include moisture control, slab depth, and the choice of underlayment. The right pairing prevents heat from leaching away and supports long-lasting warmth.
- Moisture management and vapor barriers to guard against damp
- Precise slab preparation and leveling for even insulation layers
- Under-screed insulation and edge insulation to minimize thermal bridging
- Compatibility with underfloor heating or radiant systems for responsive warmth
In South Africa, getting the base layer right translates to tangible comfort and energy savings!
Thermal mass and heat transfer in concrete floors
Concrete floors aren’t just solid surfaces; they’re quiet energy players. In South African homes, the floor’s thermal mass acts like a winter battery, absorbing sun and releasing it when the night cools. This balance—mass with insulation—keeps rooms steady and comfortable. Understanding how a concrete floor for insulation works is the first step toward warmth with less energy fuss.
Heat moves through concrete mainly by conduction, and the pace is shaped by moisture, slab depth, and the interface with floor coverings. With the right pairing, the mass moderates swings and makes mornings feel calmer.
- Conduction and thermal mass work hand in hand.
- Edge and layer interactions influence perceived warmth.
- Radiant systems respond with reassuring immediacy.
Why insulation matters for ground-floor and slab-on-grade
Across South Africa, up to 30% of heating energy escapes through floors, turning chilly mornings into a slow start. Understanding concrete floor for insulation helps shift that energy loss into a steady, comforting warmth underfoot. This is where ground-floor and slab-on-grade design meets everyday life with quiet purpose.
A well-designed floor balances mass and barrier layers. When moisture, slab depth, and finishes interlock, heat is stored during the day and released at dawn, keeping rooms calm.
Edge warmth, layering, and radiant compatibility shape how you feel the floor’s quiet energy the moment you step inside.
- Edge warmth and drafts that creep along the room’s edge
- Moisture barriers and slab moisture management
- Compatibility with underfloor radiant systems and finished coverings
In rural homes, where mornings carry dew and evenings carry a story, the right concrete floor supports daily life with steadiness and grace.
Key factors that affect floor insulation performance
Mornings in South Africa often require more than coffee; a well-tuned floor can be the quiet hero. Across the country, up to 30% of heating energy escapes through floors, turning a warm room into a chilly memory.
Understanding the concrete floor for insulation hinges on a few levers: moisture management, slab depth, and the dialogue between surface finishes and any underfloor systems. The right balance stores heat when the sun bakes the slab and releases it at dawn, keeping rooms calm. The floor, after all, is a patient host—silent, steady, and impeccably punctual.
Consider these factors:
- Edge warmth and drafts that creep along the room’s edge
- Moisture barriers and slab moisture management
- Compatibility with underfloor radiant systems and finished coverings
Insulation Methods and Materials for Concrete Floors
Rigid foam insulation options under slabs
Comfort begins at the floor, a truth many South African homes feel as winter whispers under the slab. The warm heartbeat of a home often hides there; a well-sealed base keeps heat where it belongs. A practical path is a concrete floor for insulation that doesn’t burden the design but quietly elevates comfort: rigid foam under slabs forming a continuous thermal barrier.
Rigid foam under slabs relies on boards that resist moisture, hold their shape, and deliver reliable R-values. Common South African options include:
- Extruded polystyrene boards (XPS)
- Expanded polystyrene boards (EPS)
- Polyisocyanurate boards (PIR)
Each type has trade-offs in cost, thickness, and vapor management. Professionals tailor the choice to climate and slab on grade. Install with a vapor barrier and a slim screed for a level, comfortable finish.
This approach keeps the concrete floor for insulation performing year after year in our climate.
Interior vs exterior insulation approaches for finished floors
Warmth starts underfoot—our winters prove it, and up to a third of heat loss in some homes slips right through the floor. For a concrete floor for insulation, the question isn’t only what you lay down, but where you place it: interior versus exterior insulation approaches for finished floors.
Interior routes pack warmth under the finished surface with quicker retrofits:
- Insulated screeds and underlayment options for a concrete floor for insulation with a comfortable base
- Low-profile radiant heating systems that turn mornings into a warm welcome
- Interior spray foams or rigid boards installed from the room side
Exterior strategies wrap the slab from outside, reducing thermal bridging and keeping the interior space uncluttered by insulation layers in the wrong places. They’re ideal for new builds or major renovations where external façades can be redesigned.
- External rigid foam boards around the perimeter
- Insulated concrete forms (ICFs) for continuous insulation
- Edge insulation and thermal breaks that stop heat loss at the slab edge
Vapor control and moisture management with concrete insulation
Moisture hijacks comfort and longevity more quietly than frost—in South Africa, some projects show up to 25% of indoor dampness tracing back to the slab. Vapor control isn’t a cosmetic add-on; it’s a backbone of durability in a concrete floor for insulation. I’ve watched adhesives fail and finishes blister when moisture slips through the substrate and into living spaces.
Material choices shape that shield. The right barrier—often a robust vapor membrane—paired with sealed joints creates quiet resilience. Breathable insulation slows moisture migration, letting thermal mass do its work without the threat of damp.
- Vapor barriers: polythene sheets or composite membranes
- Breathable insulation that manages moisture without trapping it
- Careful joint detailing to prevent capillary leakage
In the long run, moisture management preserves the character of a space, allowing the floor to maintain its quiet, durable performance.
Insulation wraps and radiant barrier systems for concrete floors
A floor that breathes warmth is the quiet hinge of a South African interior. In winter, up to a third of heat can slip through an uninsulated slab—a thief in disguise—so the quest for a sturdy concrete floor for insulation begins with smart layers that guard moisture and heat alike.
Insulation wraps and radiant barriers rise as conjured shields:
- Insulation wraps that hug the slab edge, reducing edge losses
- Radiant barrier systems—foil-backed layers that reflect cool from below and keep warmth above
Beyond the gleam of membranes, careful material choices—rigid foam, mineral wool, and breathable insulation—guide moisture and mass in harmony. The result is a quiet, durable surface that supports life and design—an investment in comfort and lasting value!
Installation Techniques for Insulated Concrete Floors
Preparing the subfloor and surface for insulation
In South Africa, up to 25% of heat escapes through uninsulated floors—a sobering reminder that a well-prepared subfloor is not vanity but necessity. A carefully prepared surface for a concrete floor for insulation can shave heating costs and steady indoor temperatures, turning brisk evenings into comfortable living.
Preparing the subfloor and surface for insulation starts with a clean, dry canvas. Inspect moisture, fix leaks, and plan for a flat, even plane.
- Inspect moisture and dampness; fix leaks and defer insulation if moisture remains high.
- Clear debris, oils, paint, and loose material to create a clean, dry plane.
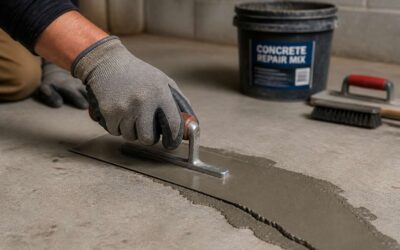
- Fill and smooth cracks or low spots to ensure a flat, even substrate.
- Choose a compatible primer for the insulation system and substrate type.
With a stable base, the insulation system can perform as intended, delivering durable comfort and energy efficiency.
Step-by-step installation of foam boards or screeds
In SA, up to 25% of heat escapes through uninsulated floors, and that’s no joke. With a disciplined installation, a concrete floor for insulation can stay warm and save you money.
- Layout, cut, and lay foam boards to fit the space, keeping joints tight and orderly.
- Bond boards with a compatible adhesive and secure edges with fasteners where required.
- Seal all joints with foil tape or seam tape to block air paths.
- Install a moisture barrier if specified, then prep for screed or top layer after curing.
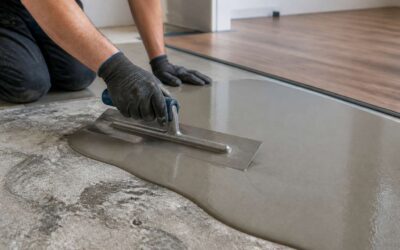
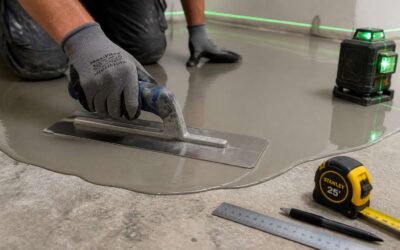
- Pour or lay the leveling screed, trowel to a true plane, and allow to cure fully.
A flat, stable base ensures the insulation layer performs as designed, reducing thermal bridging and delivering consistent comfort across rooms.
Moisture testing and site prep before pour
Heat slips through uninsulated floors, and in South Africa as much as 25% of warmth can vanish below the living room. For a concrete floor for insulation to sing, moisture testing and site prep before pour are essential, not optional. Moisture meters read the substrate’s heart, guiding vapor-barrier decisions and preventing delamination later. Experience shows that a dry, honest base is half the battle won.
- Assess substrate moisture content and vapor transmission
- Ensure the surface is clean, dry, and free of oils or coatings
- Plan the vapor barrier and insulation layout so it communicates with the slab assembly
With those checks, the pour is set on a disciplined prelude—a true plane ready to cradle the insulation and keep air paths at bay.
Compatibility with underfloor heating systems
Heat should travel as a companion, not a warranty stamped into the walls. The right installation techniques for a concrete floor for insulation create a living skin that works with underfloor heating systems to kiss the toes with even warmth. A dry, honest base continues to echo its promise long after the pour.
Compatibility with underfloor heating hinges on design intent: how insulation communicates with the slab, where control zones live, and what finishes won’t impede heat. The slab’s thermal mass becomes an ally, smoothing cycles rather than shouting in bursts.
- Electric UFH or hydronic loops should be considered in the design phase to ensure even heat distribution
- Finishes and screeds must support uniform thermal diffusion while allowing moisture to vent naturally
With that dialogue in place, the floor breathes. The result is a steady, comfortable interior climate that doesn’t demand drama from the walls—just confident, quiet warmth.
Quality checks and common pitfalls
Across South Africa, energy bills bite hardest when slabs surrender heat to a cool night. A well designed concrete floor for insulation behaves like a patient engine—storing warmth and releasing it evenly, never in dramatic bursts. Quality checks set the rhythm: moisture testing, a true level surface, and an uninterrupted insulation envelope from edge to core, so the floor skin breathes and lasts.
- Flatness and tolerances checked prior to pour
- Joint and edge sealing to preserve insulation continuity
- Moisture barrier integrity and sensible aeration paths
Common pitfalls linger in the margins: rushed pours that trap dampness, skipped cure intervals, and misaligned insulation joints that carve thermal bridges. Finishes that clamp rather than cradle heat compound the problem. When these shadows drift, the concrete floor for insulation remains quiet, generous, and dependable for the long haul.
Maintenance, Costs, and Energy Savings of Insulated Floors
Cost considerations and return on investment
For a concrete floor for insulation, upkeep is largely quiet and practical. A sealed surface resists wear, while moisture barriers and periodic checks keep the subfloor aligned with the cold season—no drama, just steady warmth.
Costs hinge on materials, thickness, and installation complexity, but the story ends in savings. The return on investment shows up as lower energy bills and enhanced comfort—often a practical payback in South Africa’s fluctuating tariffs.
- Upfront material and labour costs
- Expected lifespan and maintenance intervals
- Net energy savings and payback period
Energy savings flow from the slab’s patient thermal mass and its insulation wrap, smoothing cold snaps and cutting furnace cycling. Over time, this translates into measurable reductions in energy use and steadier budgets.
Maintenance tips for insulated concrete floors
Maintenance for a concrete floor for insulation is surprisingly gentle—a season of use, not drama, and a few simple checks keep the system singing. A sealed surface resists scuffing, while moisture barriers keep the subfloor dry and stable through winter spikes. The result is a steady warmth that doesn’t shout, just quietly carries the house through cold spells.
Maintenance tips for insulated floors include these practical checks:
- Annual moisture checks and visual inspections for damp spots
- Re-seal high-traffic areas and touch up protective coating
- Keep drainage clear and allow ventilation to prevent condensation under the slab
Upfront costs for a concrete floor for insulation depend on material grade, thickness, and installation complexity. Yet the long view shows blended efficiency: energy bills shrink as the slab’s thermal mass moderates swings, delivering net energy savings and a sensible payback, especially when tariffs shift in South Africa.
Energy savings and comfort benefits
Maintenance of a concrete floor for insulation is surprisingly gentle—a quiet steward, not a drama-maker. Regular surface care and a sound moisture barrier keep the system dry, resilient, and ready to deliver steady warmth through the coldest spells.
Upfront costs hinge on material grade, thickness, and installation complexity. Yet the long view shines: the concrete floor for insulation moderates temperature swings, lowering energy bills over time, a value amplified as tariffs shift in South Africa.
Energy savings and comfort emerge as a natural partner to the concrete floor for insulation’s thermal mass. The slab stores warmth and releases it gradually, creating a livable climate without loud heating surges—quiet, dependable comfort that makes a home feel consistently welcoming.
Choosing reputable contractors and ensuring code compliance
Maintenance for concrete floor for insulation stays gentle and predictable. Regular surface care, prompt spill cleanup, and an occasional inspection of edge details keep the system dry and resilient. When the moisture barrier remains intact, the warmth stays steady and the floor wears gracefully through the seasons.
Upfront costs hinge on material grade, thickness, and installation complexity. The long view rewards patience: durable installations and proper code compliance reduce future capex and service interruptions. Always hire reputable contractors who are licensed, insured, and familiar with South Africa’s building standards to avoid costly missteps.
Energy savings follow naturally as the slab moderates temperature swings, trimming bills and enhancing comfort. A well-installed insulated floor quietly supports a warmer home, even during icy nights.

0 Comments