Understanding Concrete Floor Repair Kits
What Is a Concrete Floor Repair Kit?
Consider this. A single hairline crack in your garage floor can widen into a serious structural nuisance within one rainy season! That is why a concrete floor repair kit exists, providing a curated box of materials designed to patch voids, bond delaminations, restore surfaces without calling in a contractor.
Most kits include a primer, a patching compound, and a trowel. The primer prepares the porous surface for a lasting bond. The compound needs compressive strength matching your concrete. Some kits add fibres, though for small chips that is overkill.
Understanding what a kit doesn’t do is equally vital. It won’t fix structural movement, expansive soil issues, or rebar rusting underneath. But for typical cracks, chips, and surface spalls, a concrete floor repair kit gives you a proper fix without a week of DIY regret.
Common Causes of Concrete Floor Damage
A single rainy season in Johannesburg or Durban can be brutal on a garage floor. Water finds its way into microscopic pores, and as temperatures fluctuate, the freeze and thaw cycle goes to work. Before long, that smooth surface you installed a few years back starts to look like a patchwork of cracks and spalled patches. It is a common sight across South African homes, and it often leads to a frantic search for a reliable concrete floor repair kit.
Understanding why the damage occurs is the first step toward fixing it properly. Concrete is a porous material that reacts to its environment. The primary culprit is water intrusion. When moisture seeps into the slab, it can wash out the fine aggregates and weaken the binder. Another major factor is physical impact. Dropping a heavy engine block or a steel toolbox creates stress fractures that radiate outward. Then there is the issue of ground movement. Expansive clay soils, common in Gauteng, shift with seasonal moisture changes, causing the slab to flex and crack.
Here are the typical stages of wear you might observe:
– Hairline cracks that spider across the surface.
– Surface scaling or flaking, where the top layer peels away.
– Pop-outs, which are small, cone-shaped holes left by weak aggregate.
– Larger structural cracks that indicate a deeper settlement issue.
For the first three issues, a quality concrete floor repair kit offers a straightforward solution. These kits are designed to handle the cosmetic and surface-level restoration that protects the underlying structure. They bridge the small gaps and rebind the surface, stopping the deterioration in its tracks. However, a kit is not a miracle worker. It will not lift a sunken slab or mend a foundation that is actively shifting. That requires professional intervention and structural engineering, not a weekend DIY project.
By recognising the difference between surface wear and structural failure, you can make an informed choice. If the damage is limited to the top few millimetres, a concrete floor repair kit is your best bet. It provides the necessary materials to restore the integrity of the surface, preventing a small crack from turning into a costly headache.
When to Use a Repair Kit vs. Professional Services
The gap between a DIY fix and professional intervention is not always obvious. A concrete floor repair kit handles the visible damage: the spalls, the cracks, the surface wear. It does not address the forces underneath.
Consider the age of your home. In older Johannesburg properties, the slab has settled. Cracks are stable. A kit works well. In newer builds, the soil is still adjusting, and any repair now will reopen.
- Hairline cracks with no raised edges: a kit will do.
- Cracks wider than 5 mm, or with one edge raised: professional.
- Surface spalling from wear or spills: a kit will do.
- Recurring cracks in the same spot: structural issue.
I have watched homeowners spend a weekend with a kit only to see the patch fail. The kit was not the problem. The diagnosis was. A concrete floor repair kit is a finishing tool, not a structural solution.
Safety Considerations Before Starting
Roughly 70% of DIY concrete repairs fail within the first year, and the culprit is almost always a misjudged chemical reaction. A concrete floor repair kit is not a single substance; it is a choreographed blend of polymers, silicates, and bonding agents. Understanding the action of these components is your first line of defense.
Your personal protective equipment matters more than the product itself. The high alkali components in the bonding agents can cause chemical burns on contact. Work in a space with cross ventilation to disperse the fine particulates that become airborne during mixing. Always use nitrile gloves, as latex degrades quickly when exposed to these resins. A proper respirator is non-negotiable, as the dust can irritate the bronchial passages.
Preparation is a safety protocol in itself. Ensure the substrate is entirely dry before you open the activator. Moisture trapped beneath the patch will create a pressure blister that eventually ruptures. The sequence of actions in your chosen concrete floor repair kit is designed to create a mechanical lock with the old slab. Respect the cure time; a patch that feels hard to the touch is often still vulnerable to abrasion for several days.
Key Components and Material Selection
Types of Repair Compounds Explained
A concrete floor repair kit is only as good as its compound. The binder, the aggregate, and the hardener work as one system. In South Africa, where floors face heat and heavy loads, the selection of these components matters more than the brand name.
Repair compounds fall into three families. Epoxy resins bond strongly and resist chemicals. Polyurethane compounds flex with movement. Cementitious mixes match existing concrete. Each serves a different failure mode.
- Epoxy for cracks and spalls
- Polyurethane for joints and dynamic areas
- Cementitious for shallow surface repairs
Match the compound to the damage, not the price. I have seen a concrete floor repair kit with the wrong binder fail within months. That is a costly mistake!
Essential Tools Included in a Standard Kit
The effectiveness of a concrete floor repair kit hinges on the binder technology, which dictates adhesion and flexibility. A polyurethane-based compound offers superior movement accommodation, making it ideal for areas subject to thermal expansion or slight structural shifts. Conversely, an epoxy binder excels in high-impact zones, providing a rigid, durable surface that withstands heavy traffic and chemical spills without degradation.
Before application, the surface demands thorough preparation to ensure the binder forms a mechanical lock. You will need specific tools to execute this correctly. A standard kit should be paired with the following items:
1. A chipping hammer or angle grinder to remove loose material and create a mechanical profile.
2. A stiff broom and industrial vacuum to eliminate all dust and debris.
3. A mixing paddle attached to a low-speed drill for achieving a uniform, lump-free blend.
The aggregate within the mix is equally crucial; well-graded silica sand prevents shrinkage and enhances compressive strength. In the diverse South African climate, from the highveld’s cold winters to the coastal humidity, the ambient temperature affects curing times. Always match the compound’s specification to the environmental conditions to prevent premature failure. A proper preparation routine is the quiet architecture of a lasting repair; the visible result is only as strong as the quiet preparation that precedes it.
How to Choose the Right Kit for Your Floor Type
Choosing a concrete floor repair kit begins with reading the floor itself. A garage slab enduring vehicle weight demands a different compound than an outdoor patio exposed to UV and rain. The substrate’s porosity, age, and moisture content dictate which binder will form a lasting bond. We often judge damage by its visible face, yet the deeper condition decides the outcome.
Consider the floor’s function first. Warehouses require impact and abrasion resistance. Domestic spaces prioritise ease of application and cosmetic finish. The same kit cannot serve both purposes.
- Evaluate crack width: hairline fractures need low-viscosity compounds, spalled areas need trowel-grade fillers.
- Assess exposure: chemical spills, standing water, or direct sunlight each demand specific binder chemistry.
The physical condition matters more than appearance. A floor that looks sound but fails a moisture test will reject most repair compounds. Test for dampness before purchase. The right concrete floor repair kit aligns with your measured reality, not the boldest label.
Understanding Patch vs. Self-Leveling Options
Open a concrete floor repair kit and the first decision presents itself. Patch or self-leveling? The distinction hinges on viscosity, which is controlled by binder chemistry. Patch compounds combine polymer-modified cements with angular aggregates, making them stiff enough for trowel application on vertical edges. Self-leveling materials use fine fillers and low-viscosity resins that flow and settle without assistance. South African conditions add nuance. Highveld temperature swings and coastal humidity alter curing rates, so component selection matters. In my experience, the key material groups are:
- Binder type: epoxy for chemical resistance, polyurethane for flexibility, cementitious for breathability.
- Aggregate size: coarse for deep spalls, fine for thin flowing layers.
- Additives: plasticisers for flow, accelerators for cold mornings.
Crack width and floor slope determine which option applies cleanly.
Storage and Shelf Life of Repair Materials
A half-used bag of repair material stored in a Cape Town garage absorbs coastal damp, and the chemistry inside shifts. That concrete floor repair kit bought in June may be inert by November. Moisture triggers premature curing. Heat accelerates binder degradation. Epoxy components separate into amber layers. Polyurethane thickens into a viscous mass.
Storage dictates lifespan. Follow these rules:
– Seal containers after each use, pressing out air.
– Store between 10 and 25 degrees Celsius.
– Label every bag with the opening date.
– Keep resin components upright to prevent skinning.
Shelf life for most polymer-modified cements is twelve months. South African suppliers print batch codes for a reason. Respect them. I have watched failed patch jobs trace back to compromised materials more often than poor trowel work. Checking your concrete floor repair kit before starting saves a second trip to the supplier.
Step-by-Step Repair Process
Preparing the Surface: Cleaning and Etching
Surface preparation is the difference between a patch that lasts ten years and one that fails in ten months. Before any concrete floor repair kit touches your floor, you need a clean, porous substrate. Dirt, grease, and old sealers will block adhesion completely.
Start with a stiff broom and a vacuum to remove loose debris. Then wash the area with a degreasing cleaner, scrubbing thoroughly. Rinse until the water runs clear.
Etching opens the surface pores so the repair compound can grip.
- Apply the etching solution.
- Wait five to ten minutes.
- Scrub with a coarse brush.
- Rinse until the pH is neutral.
Let the floor dry fully. Trapped moisture causes early failure. Consult your concrete floor repair kit for the required dryness.
Mixing the Repair Compound Correctly
The moment you open a concrete floor repair kit, the clock starts. The powder and liquid are not suggestions; they are a chemical contract. I have seen a hurried pour ruin a repaired floor in one winter. Measure both components by weight, not by eye, because humidity changes the density.
Mixing correctly is a discipline. Follow this order:
1. Pour the liquid into the bucket.
2. Add the powder gradually.
3. Mix with a drill paddle at low speed for two minutes.
4. Scrape the sides and bottom, then mix one minute more.
Stop when the compound pulls away from the paddle; that is your signal! A stiff, even paste is your goal. Thin mixture will not level. Thick mixture will trap bubbles. The concrete floor repair kit gives you one continuous window to work, so respect the pot life.
Applying the Patch for Small Cracks and Holes
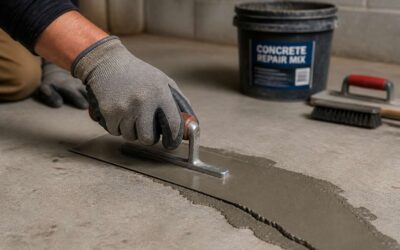
Small cracks demand a patient hand. Trowel the compound into the crack, working from the lowest point upward to push out trapped air. Overfill the gap slightly, then strike the patch level with a straight edge. That excess is the only buffer against shrinkage as the material cures.
After thirty minutes, float the patch with a damp sponge to close the surface texture. The concrete floor repair kit rewards a clear sequence, so keep your strokes steady and work in one continuous pattern.
- Dampen the crack and keep the surrounding slab dry.
- Pack the compound down to the base of the void.
- Strike off the patch at the level of the existing floor.
- Float the surface once the compound has firmed slightly.
Thin coats beat a single thick slab for deeper holes. The floor will stay flat where the old failure began, and the reverse of a damaged slab is a clean joint that you will not identify later.
Using Self-Leveling Compounds for Larger Areas
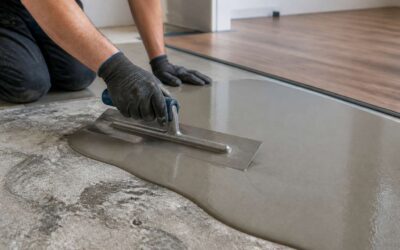
A floor with a dip bigger than a braai tong is no time for guessing. Self-leveling compound handles the drama. Pour it, watch it spread, let it find the horizon. One pour solves what a trowel cannot. The concrete floor repair kit with self-leveling compound demands speed after mixing.
Work in this order:
- Prime the bare concrete until it shows a sheen.
- Mix the compound to a batter consistency.
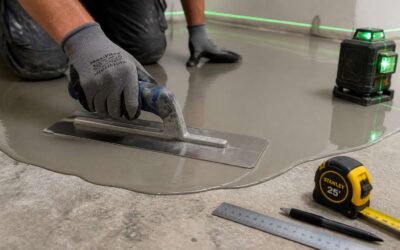
- Pour from the lowest point in a continuous ribbon.
- Break surface bubbles with a spiked roller.
The material settles to a true level on its own. It obeys gravity, not impatience. Do not push it around with a trowel. The concrete floor repair kit rewards those who step back. A perfect slab takes shape in minutes, ready for the next stage of your flooring project.
Finishing Techniques for a Smooth Surface
A smooth finish is the final argument for any repair. The concrete floor repair kit provides the materials, but the finish depends on your touch. After the patch sets to a thumbprint firmness, work the surface with a steel trowel. Pressure creates a dense, closed surface. Lift the trowel edge and you will leave ridges that demand attention.
For larger patches, use a magnesium float first. Follow with a trowel pass in the opposite direction. This cross pattern removes high spots and fills low ones. If the surface starts to dry, mist it lightly.
- Work the edges with a margin trowel to match the existing floor level.
- Use a damp sponge for a light texture on exterior slabs.
- Wait for the sheen to disappear before the final trowel pass.
Timing governs the result. Too early, the trowel drags. Too late, it polishes without bonding. The concrete floor repair kit will not save a rushed finish. Let the surface tell you when it is ready.
Curing Time and Environmental Factors
Time is the silent partner in any floor repair. The patch might look set within hours, but the chemical dance inside the mixture continues for days. A concrete floor repair kit gives you the materials, yet the environment dictates the pace. In South Africa, the sun and the humidity are not background details, they are active participants in the process.
For the first 24 hours, moisture loss is the enemy. The hydration reaction needs water to reach full strength. If the air is dry and the wind is strong, the surface will lose that water before the internal structure forms. This creates a weak, chalky top layer. Cover the repair with plastic sheeting or a damp cloth if the weather is hot. The goal is to slow the evaporation, not stop it completely.
– Cold weather below 10°C will stall the reaction entirely.
– High heat above 30°C requires you to work faster and wet the surface more often.
– Rain will wash out the mix if it falls before the patch has hardened.
Temperature swings are common here, especially on the Highveld. A patch applied in the morning sun might face a cold night. This rapid change causes shrinkage stress. The repair will crack because the top cools and contracts faster than the base. You cannot control the sky, but you can schedule the pour for a mild day. The concrete floor repair kit will not fight the elements for you. It needs a window of stable conditions to do its work correctly.
Rushing this phase is a gamble. Walking on the repaired area too soon will leave shoe prints that never come out. Placing heavy furniture on it before the internal cure is complete will compress the material permanently. The waiting period is not about the surface feeling dry, it is about the internal strength reaching a threshold that can handle a load. Give it the days it asks for, and the floor will hold. Rob it of that time, and you will see the failure later, often in the form of a hairline crack that appears months down the line.
Maintenance, Sealing, and Longevity
Sealing the Repaired Area for Protection
Once the repair has cured, the work is only half done. Sealing the patched area is what gives the repair its staying power. A concrete floor repair kit often includes a compatible sealer, but many homeowners skip this step. I have seen repairs fail simply because the sealer was skipped. Unsealed patches absorb moisture, collect grime, and crack at the edges.
A good sealer acts as a barrier against the daily wear of foot traffic, spilled oil, and cleaning chemicals. In South African homes, where temperature swings and humidity vary by region, this protection matters even more. The sealer locks in the repair compound and keeps the surrounding concrete looking uniform.
What a sealer protects against:
- Moisture penetration that weakens the bond
- Staining from oils and household liquids
- Surface dusting and erosion over time
Reapplying sealer every few years extends the life of the repair. The right concrete floor repair kit makes this straightforward, but the sealing step is where longevity is decided.
Post-Repair Maintenance Tips
A repair that looks perfect on day one can fail within months without regular attention. After the sealer has cured, the real work shifts to maintenance. I have learned that a concrete floor repair kit is only the starting point; longevity depends on how you treat the floor afterward. The kit provides the materials, but not the discipline.
Common maintenance tasks include:
- Sweeping or vacuuming to remove abrasive grit
- Wiping spills immediately to prevent staining
- Checking the repaired edges for any lifting or chipping
The surrounding concrete often wears faster than the patch itself. In South African homes, seasonal humidity changes cause subtle movement, so inspect the repair every few months. Replacing a failing patch costs more than the original repair. A simple routine keeps the concrete floor repair kit’s work intact for years.
Troubleshooting Common Repair Failures
I have watched repairs fail within months, and the concrete floor repair kit rarely takes the blame. The true culprit is a skipped step: sealing before the patch has dried fully.
In Gauteng’s dry winters, cracks reappear along the seam. Look for these warning signs:
- Lifted edges that catch dust
- Hollow echoes when tapped with a coin
- Fine hairline cracks running perpendicular
Sealing is not a one-time event. Reapply a penetrating sealer every two years, especially on floors exposed to direct sun. Longevity emerges from matching the patch compound to the slab’s flexibility, not from thicker layers.
Indicators That You Need Professional Intervention
I have inspected dozens of Highveld floors where the patch looked sound but lifted within months. Maintenance determines whether that patch holds. Sweeping grit away before it grinds into the surface, washing with a pH neutral cleaner, and drying thoroughly keep a concrete floor repair kit effective.
Sealing protects the bond against ultraviolet light and thermal movement. Highveld sun breaks down film forming sealers within eighteen months. A breathable silane sealer penetrates deeper and flexes with the slab. Recoat when water stops beading on the surface.
Some indicators rule out DIY intervention entirely.
- Cracks wider than 5 mm that reopen after two repair cycles
- Dark stains signalling moisture rising through the slab
- Spalling that exposes aggregate across more than a square metre
These point to structural movement or hydrostatic pressure, conditions no patching compound can outlast.
Extending the Life of Your Concrete Floor
A concrete floor repair kit is where the work begins. The true test of that work is how the floor performs over the next five years, through Highveld summers and winter nights. Maintenance is a practice, not a response. The daily traffic of boots, trolleys, and grit is what wears down a patch. Regular sweeping and a neutral pH cleaner are essential. A monthly inspection takes minutes and catches trouble early.
- Hairline cracks at the patch edges
- Changes in surface colour or texture
- Water pooling after cleaning
Sealing completes the repair. The wrong sealer traps moisture and fails under UV exposure. A breathable, penetrating sealer bonds with the slab and allows the concrete to breathe, protecting the repair from within.
These habits extend the lifespan of the repair. The best concrete floor repair kit cannot outlast neglect, but with consistent care, the bond holds for years.
Cost, DIY Advantages, and Environmental Impact
Comparing DIY Repair Costs with Professional Hiring
Hiring a professional to mend a damaged floor costs between R2,000 and R8,000 per day in South Africa. A concrete floor repair kit rarely exceeds a few hundred rand. The arithmetic is simple, yet many homeowners still default to the phone before checking their own garage.
DIY advantages extend beyond the price tag. You set the schedule, you control the quality of every layer, and there is the quiet satisfaction of finishing the job yourself. The learning curve is short, and the tools are already in the box.
On the environmental front, a concrete floor repair kit offers quiet advantages:
- You mix only what you need, reducing waste.
- No contractor vehicles make repeated trips.
- The packaging is minimal.
Professional callouts often involve multiple trips, each with its own carbon footprint. For the environmentally conscious homeowner, the choice is economical and principled.
Time Investment and Skill Level Requirements
The arithmetic of home maintenance rarely sparks joy, yet the figures here are stubbornly persuasive. A concrete floor repair kit hands you the means to rectify a blemish for the price of a modest dinner out, while a professional day rate in South Africa could cover a weekend away. This disparity is not merely a matter of pocket change; it is a fundamental shift in how we value our own labour.
There is a particular brand of satisfaction found in controlling the trowel yourself. You dictate the pace, you observe the material setting, and you own the result entirely. The skill required is not negligible, but it is accessible. For those who enjoy mastering a discrete task, the process of mixing and applying a patch is a pleasing antidote to an afternoon spent waiting for a contractor to arrive.
Time is the true currency here, and it demands an honest audit. Consider the following factors before you begin:
– The working time for most compounds is limited; you must work with purpose once mixed.
– Curing can take several days, depending on the product and weather.
– Your surface preparation is the single largest variable for success; rushing it invites failure.
This effort is a measured trade. You exchange a few focused hours and a modest learning curve for the cost of a professional visit. Many homes already contain the necessary trowel and bucket, rendering the barrier to entry almost negligible.
The environmental accounting is equally persuasive. A concrete floor repair kit allows you to mix only the volume you require, eliminating the waste of a partially used commercial batch. There are no vehicles making multiple trips, and the transport footprint shrinks to a single journey from the hardware store. When you perform the work yourself, you sidestep the logistical overhead that professional callouts inevitably carry.
The broader comparison between DIY and professional intervention remains a question of scale. For a minor crack or a small hole, the kit is decisively superior in cost and effort. For a crumbling slab of significant size, the calculus shifts. For the majority of common household blemishes, the kit offers a quiet, cost-effective victory that also protects the schedule of your weekend. It is a small rebellion against the default of outsourcing, and one that leaves both your floor and your budget in better condition.
Eco-Friendly Disposal and Material Options
A concrete floor repair kit costs less than a tank of petrol in most South African towns. The price includes a trowel, a tub of compound, and sometimes a bonding agent, so you are not paying for multiple trips to the hardware store. For small blemishes, that covers it.
Doing the repair yourself gives you authority over the outcome. You can work the material into the crack at your own pace, adjust the mix if the surface is particularly dry, and stop exactly when the shape satisfies you. No need to coordinate schedules or explain your floor’s history to a stranger.
On the environmental side, disposal does not need to be complicated. Follow a handful of rules:
- Allow any mixed leftovers to harden fully before binning them.
- Store unopened containers for future repairs instead of discarding them.
- Look for a concrete floor repair kit with low-VOC compounds and recycled aggregate.
This keeps solvents out of water systems and reduces the load on local landfills.
Common Mistakes to Avoid as a Novice
A concrete floor repair kit will not save you from every error, and that is a lesson most novices learn the hard way. Rushing the surface preparation is the costliest mistake. A dusty or damp crack rejects the compound, forcing you back to the hardware store within a month. The concrete floor repair kit is still the cheapest route in South Africa, far below a professional callout fee.
The DIY advantage is control. You set the pace, adjust the mix, and stop when the patch looks right. On environmental impact, the mistake is over-mixing. Measure only what you need, because excess compound that hardens in the tub is wasted material heading to landfill. Common novice mistakes include:
- Skipping the etching step
- Applying the patch too thick
- Ignoring the curing time
Every one of these errors forces a second repair, which erases the cost advantage of the kit entirely.
Frequently Asked Questions About Repair Kits
Does a concrete floor repair kit really save money in South Africa? Yes, but the saving depends on your willingness to follow instructions. A kit costs a fraction of a professional callout fee. The true cost is patience.
What does DIY offer that a contractor cannot? Control. You set the timing, the batch size, and the curing moment. No one else’s schedule dictates when your floor is ready. Environmental impact? Many homeowners ask about waste. A concrete floor repair kit creates waste only if you overmix. Measure exactly what you need, use it fully, and nothing goes to landfill. Some modern kits include eco-friendly compounds,another reason to compare labels before buying.
Can a kit handle multiple repairs? Yes, if stored correctly. Are repairs permanent? Yes, when applied to a clean, etched surface. The deeper question is whether you trust yourself with a trowel.

0 Comments